How to Set Up a Mail Merge On Word
A “mail merge on Word” simply means that you write an email in a Microsoft Word document and leave certain parts of the email blank for personalization. For example: the first name, the address or a date for orientation at the office. You then also create an Excel spreadsheet where all the information that will go into the blank fields lives. For example: a list of the first names of people, their addresses and their individual dates for orientation at the office.
“Merge”? What is Merging With What Here?
Great question. We are merging the recipient information from an Excel spreadsheet with a letter that you wrote in Microsoft Word.
Excel spreadsheet with the information of the people you are going to send your letters to.


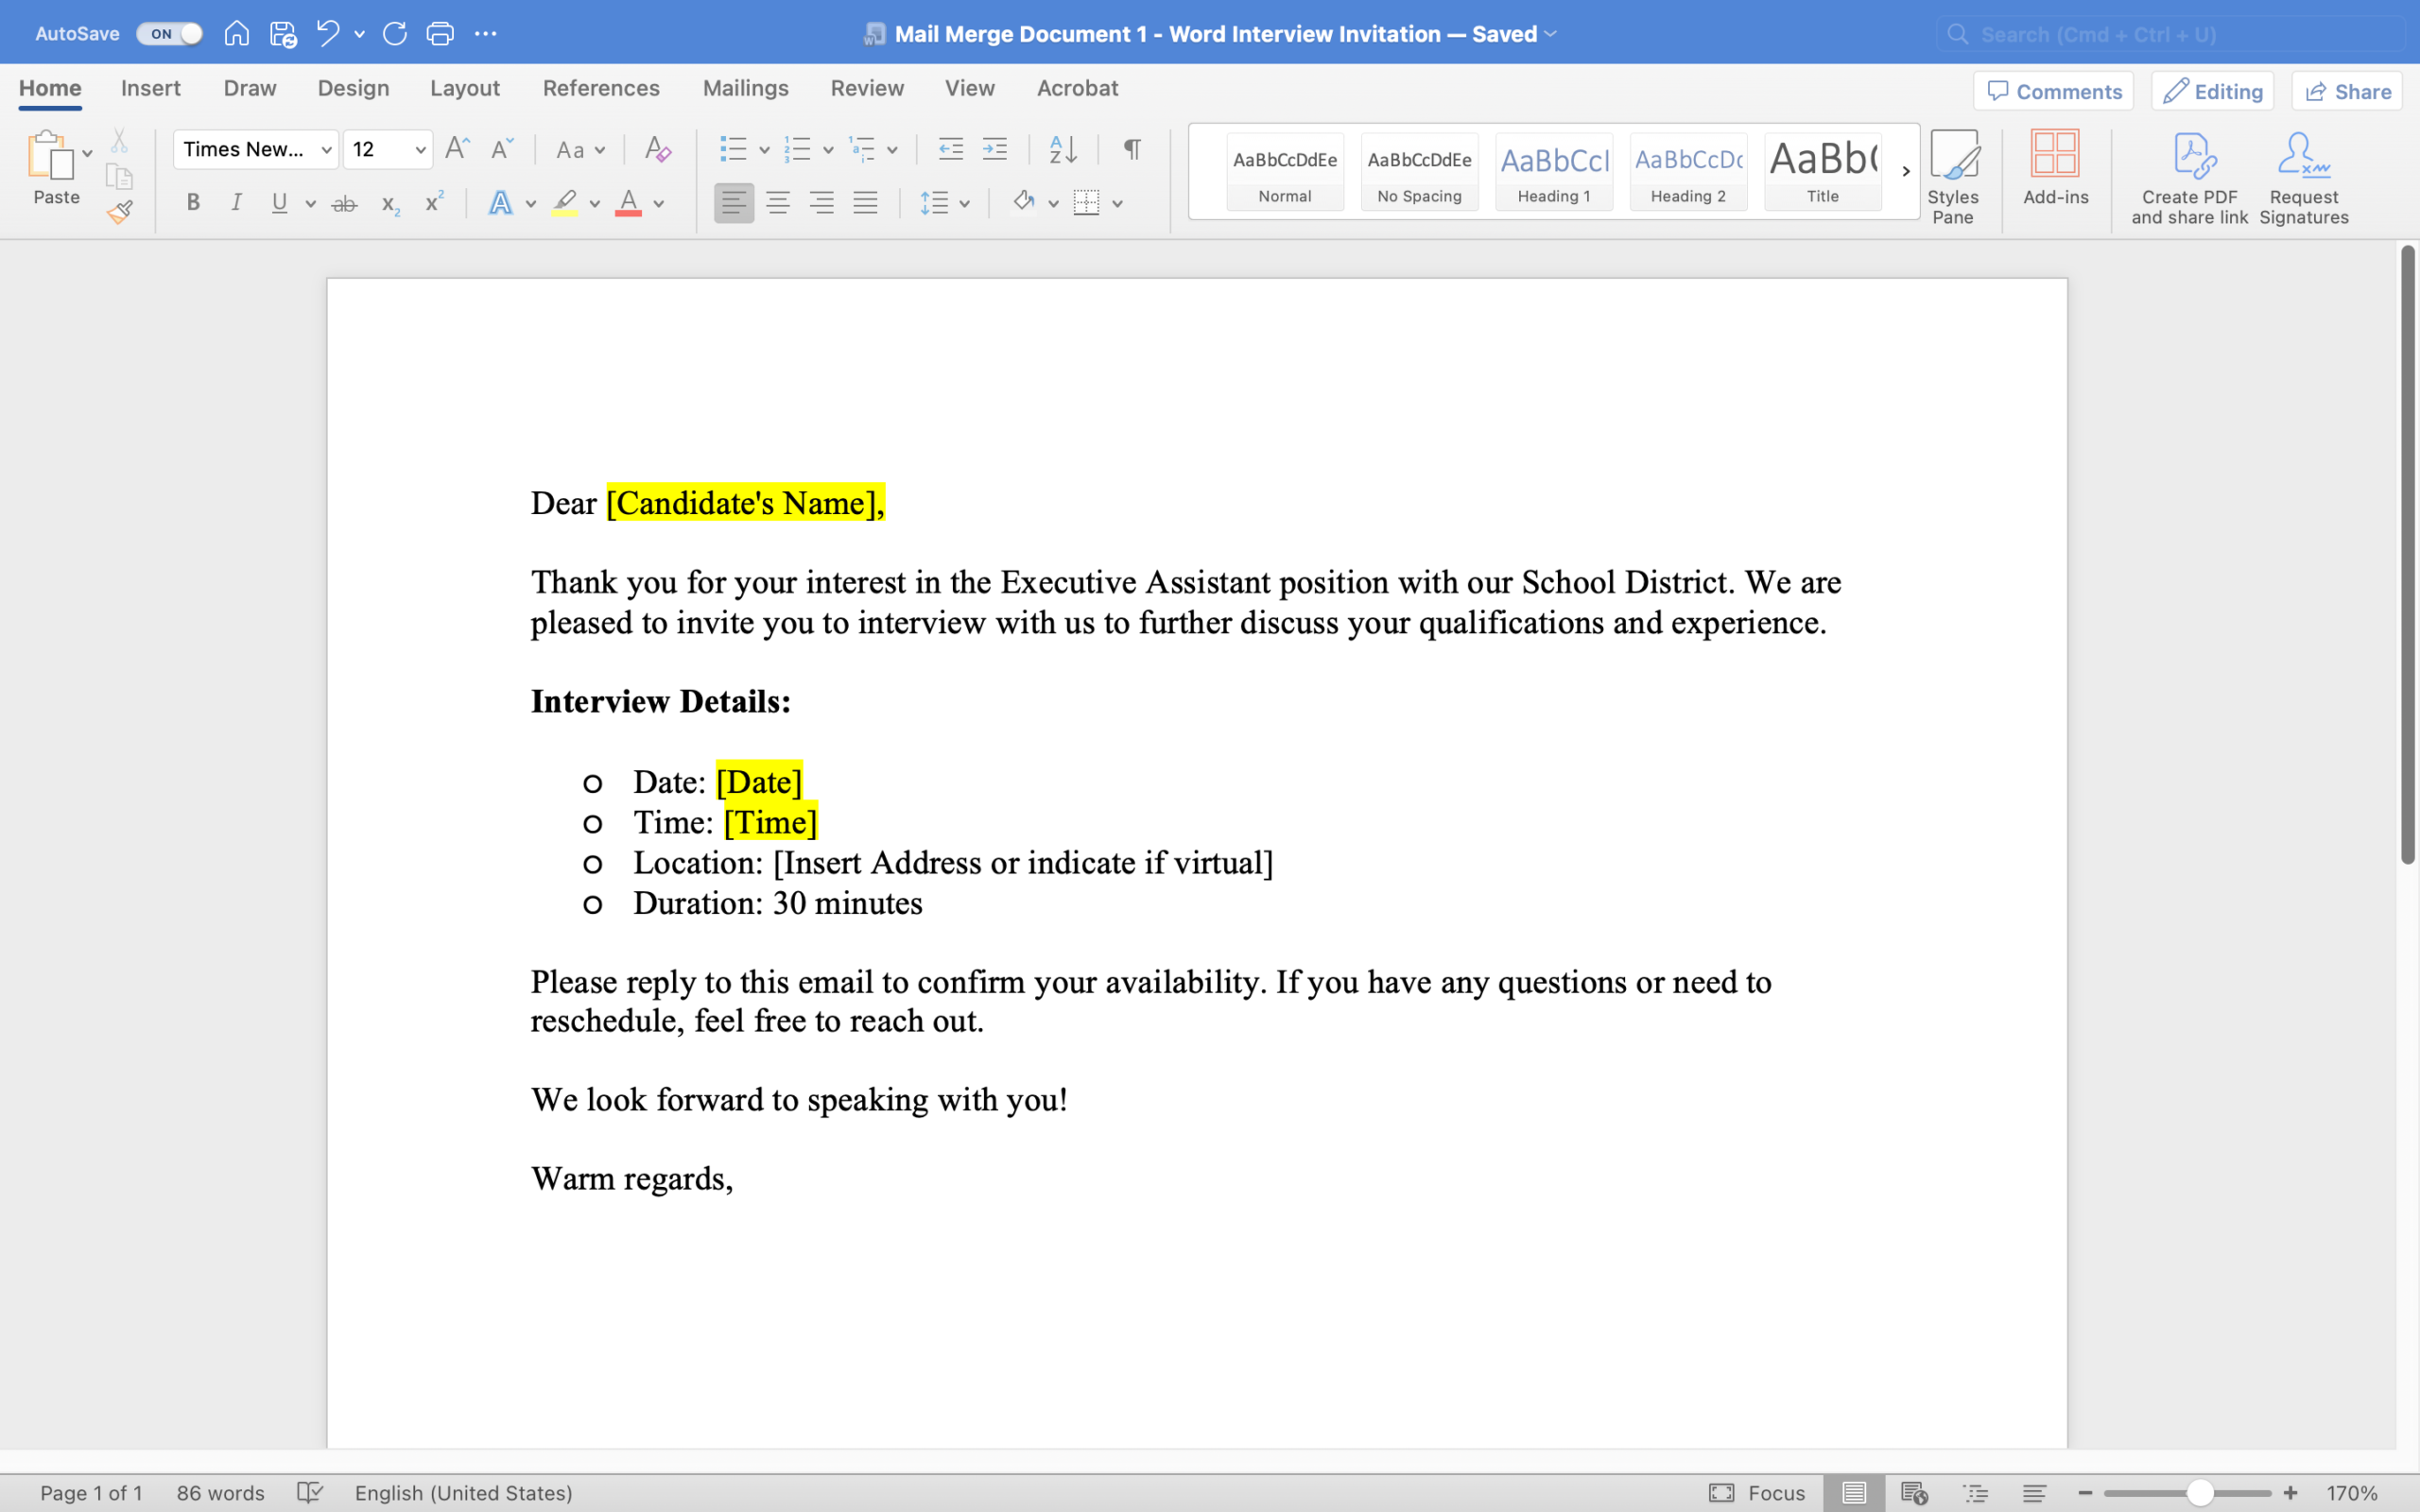
Letter in a Microsoft Word file with blank fields that will be filled with the information from the spreadsheet.
Yellow = fields that will be replaced for each email.
Free yourself from email stress!
Reduce the number of emails you get by changing the structure of the emails you send.
Learn how with this simple one-pager.

What Can I Use a Mail Merge on Word for?
Emails to new staff inviting them to orientation:
When I was working in the training department at a large urban school district, I was in charge of New Employee Orientation. I used mail merges for invitation emails for all new hires. Every new hire had to receive the same invitation email, but the fields that we personalized were:
* first name
* date of New Employee Orientation
Instead of sending each new employee a manual email, we set up an mail merge. With the mail merge an email template was connected to an automatically updated list of new staff. This created a personalized invitation email with each new employees first name and their respective new employee orientation date.
Interview invitation emails to candidates:
While you can use an unpersonalized Outlook email template that may or may not be shared with staff across the district, I prefer the personal touch of at least using the individual’s first name during the hiring process. Here are a few examples of using mail merges for emails during a hiring process:
- Interview invitations (To candidates who were selected for an interview)
- Thank you mails to candidates (To those who did not get the job after the interview round)
- Thank you for your interest letters (To those who met qualifications, but were not selected for an interview)
Mail merges with Microsoft Word and Excel can save so much time. And it’s really not that hard to set them up. Just have a little patience with yourself and dedicate 30minutes to learn the process.
How to Set Up a Mail Merge on Word – Step-by-step guide
The steps below show you how to merge information from a table in an Excel spreadsheet with a text document in word.

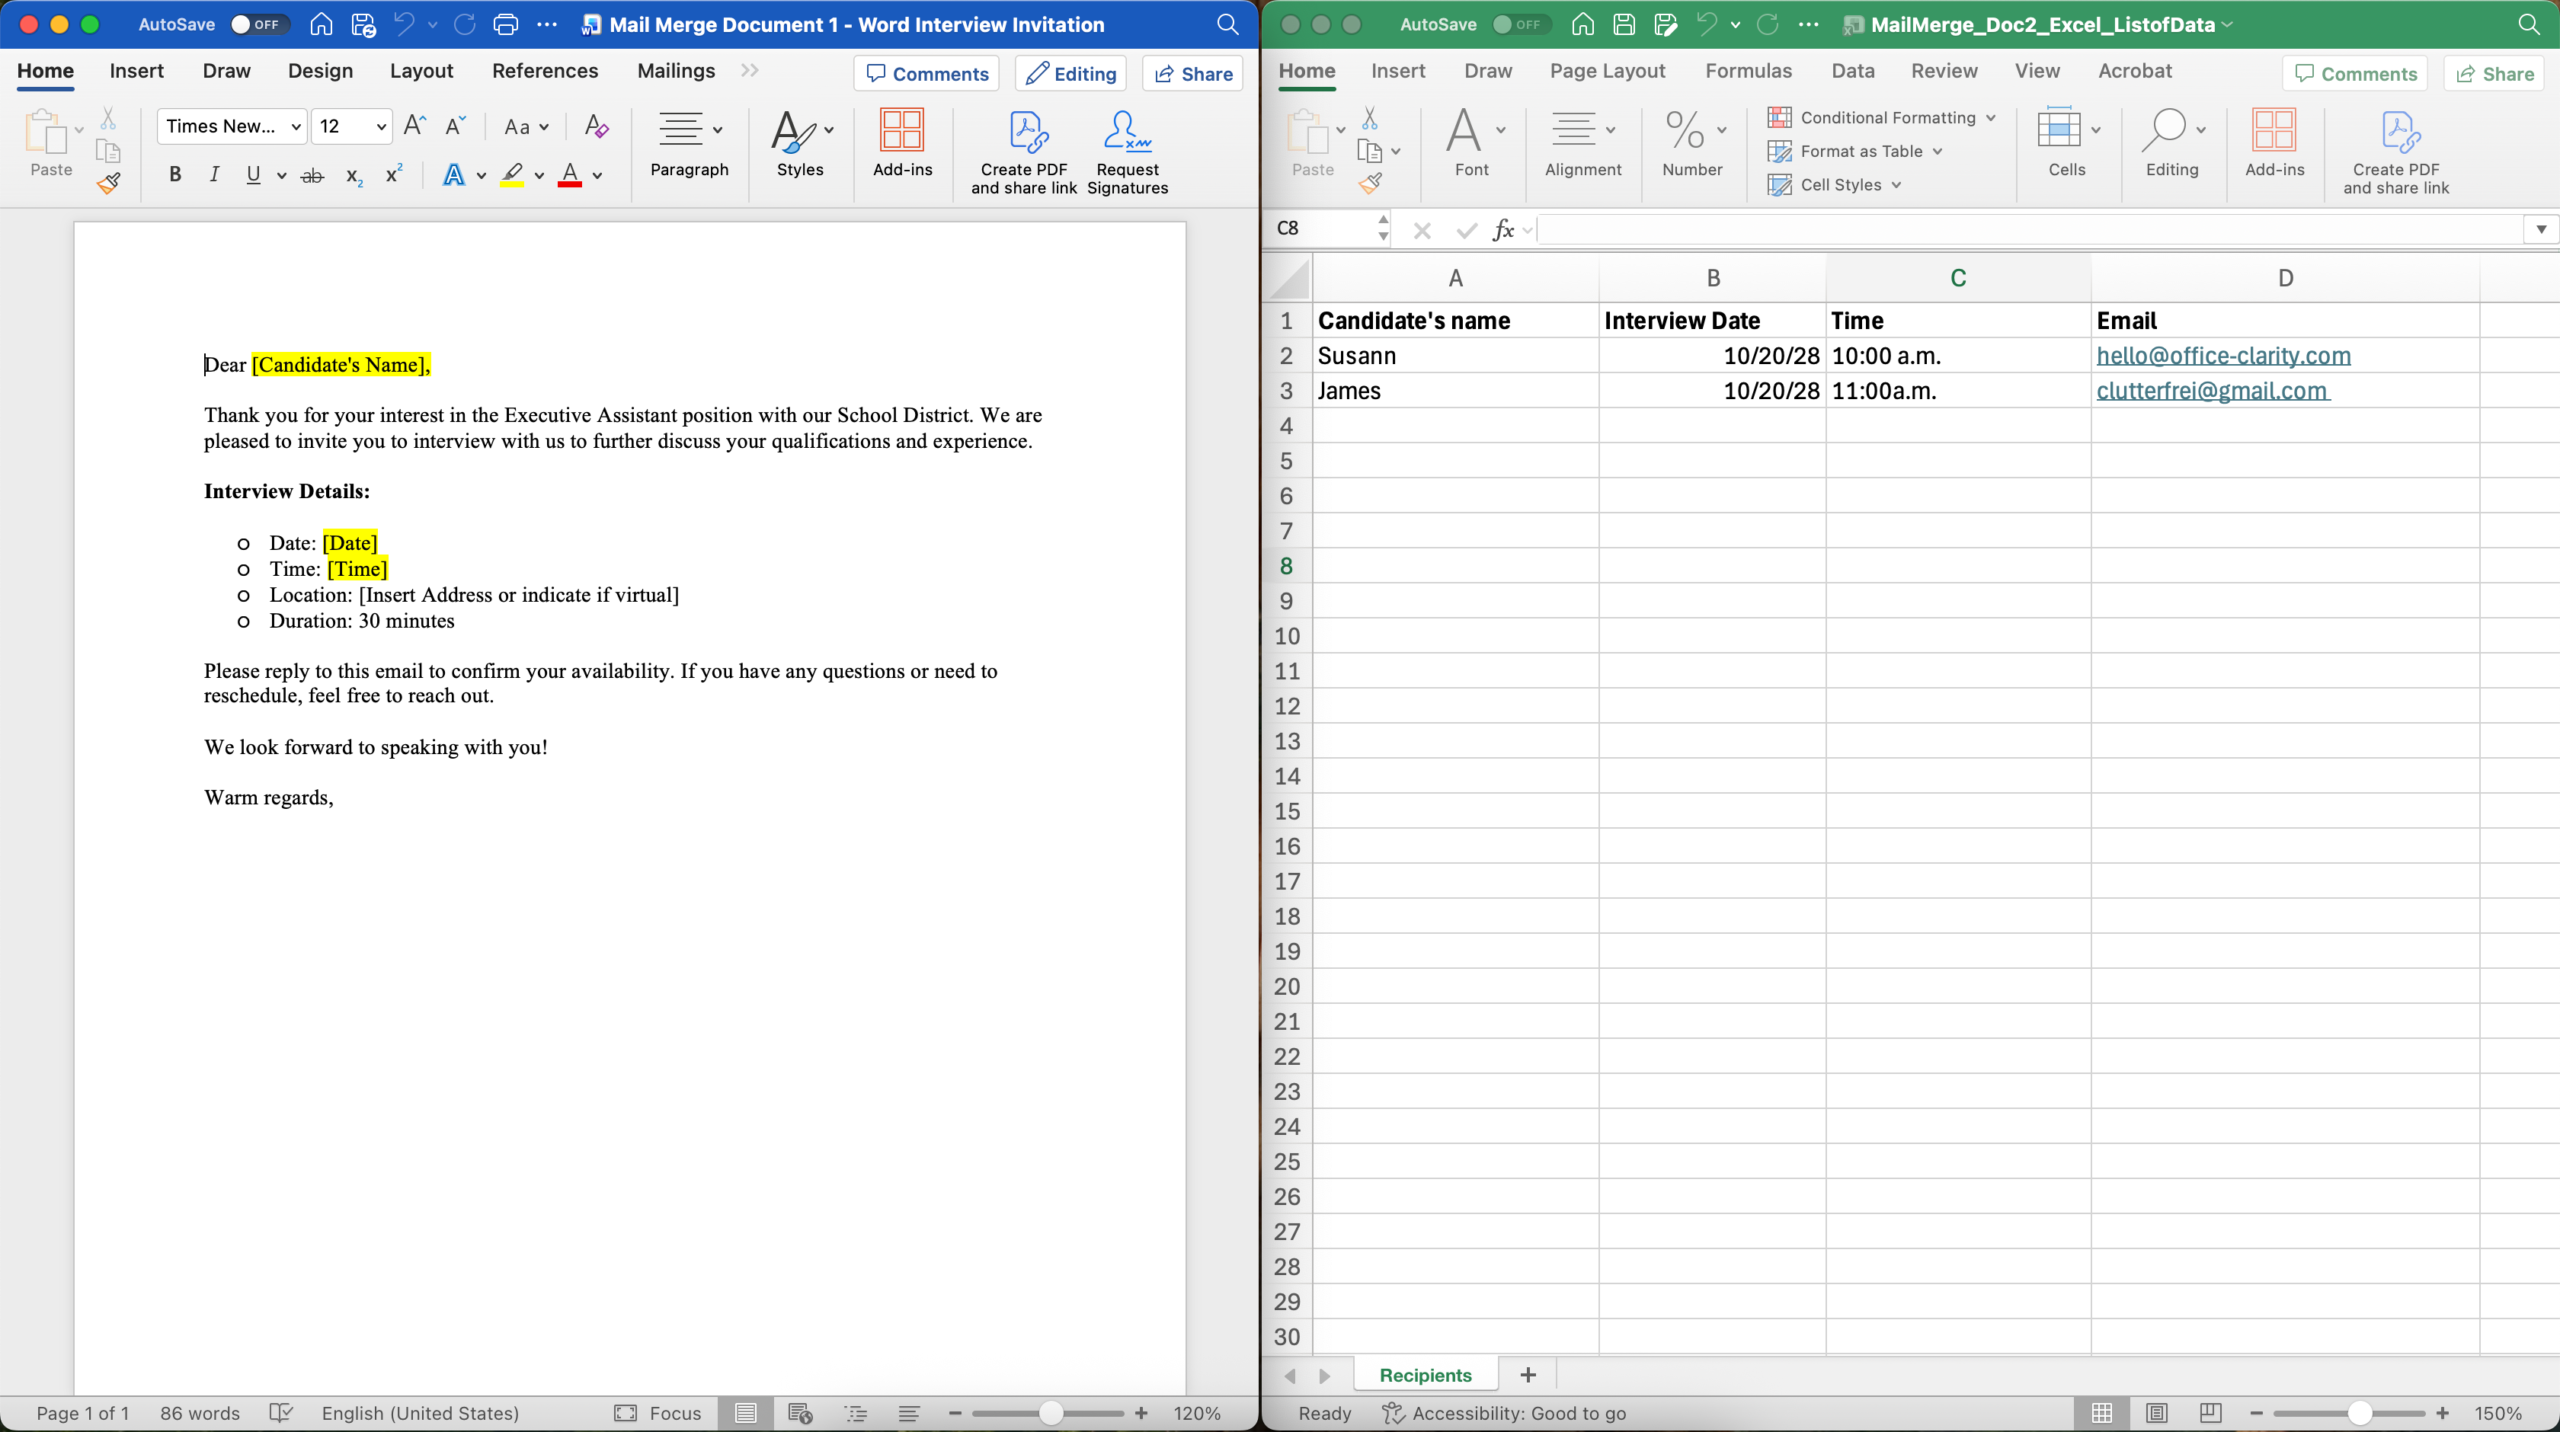
Step 1:
Have your Word document with your letter and your Excel spreadsheet with the recipient information ready.
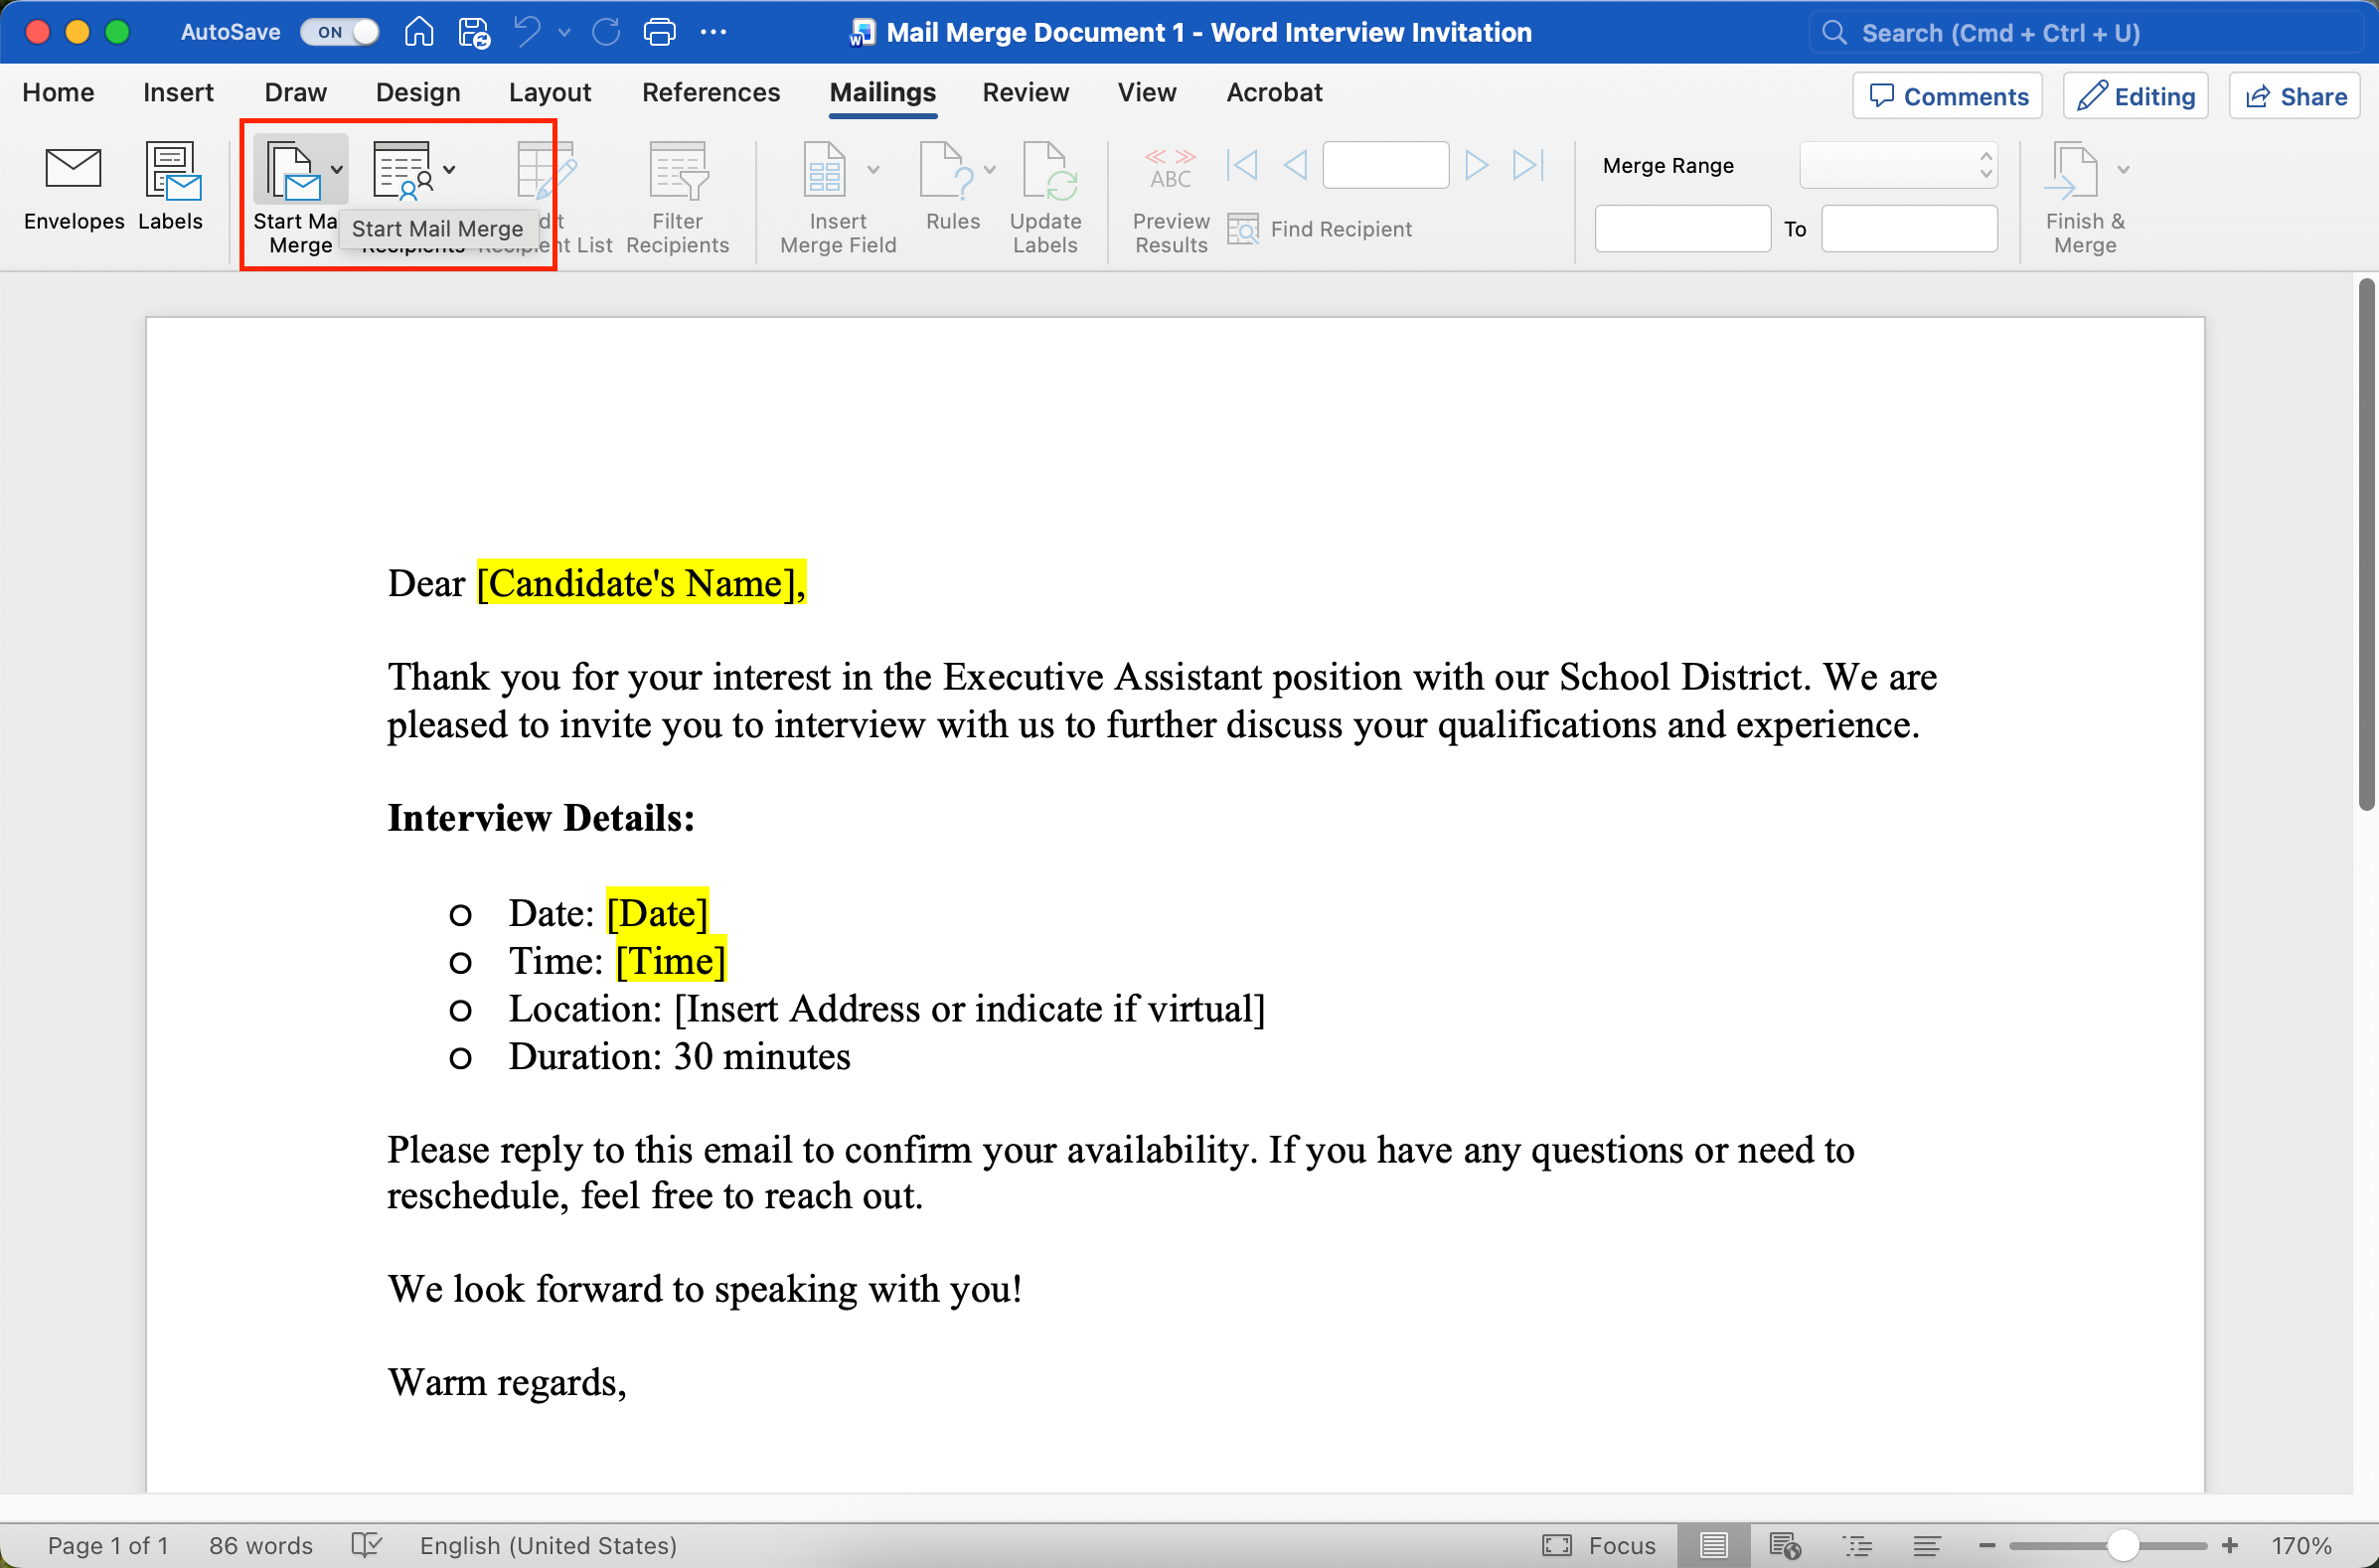
Step 2:
In the Word document, click “start mail merge”.

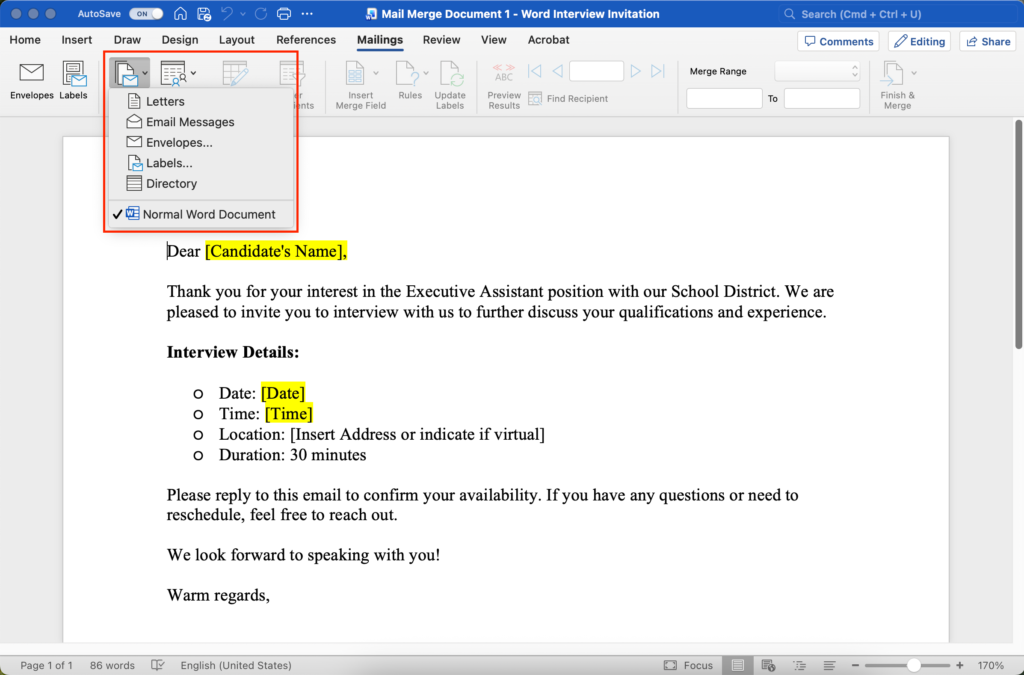
Step 3:
Select an option from the drop-down menu. The options show you the different documents you can create using a mail merge.
In this example, we are choosing “Normal Word Document”.
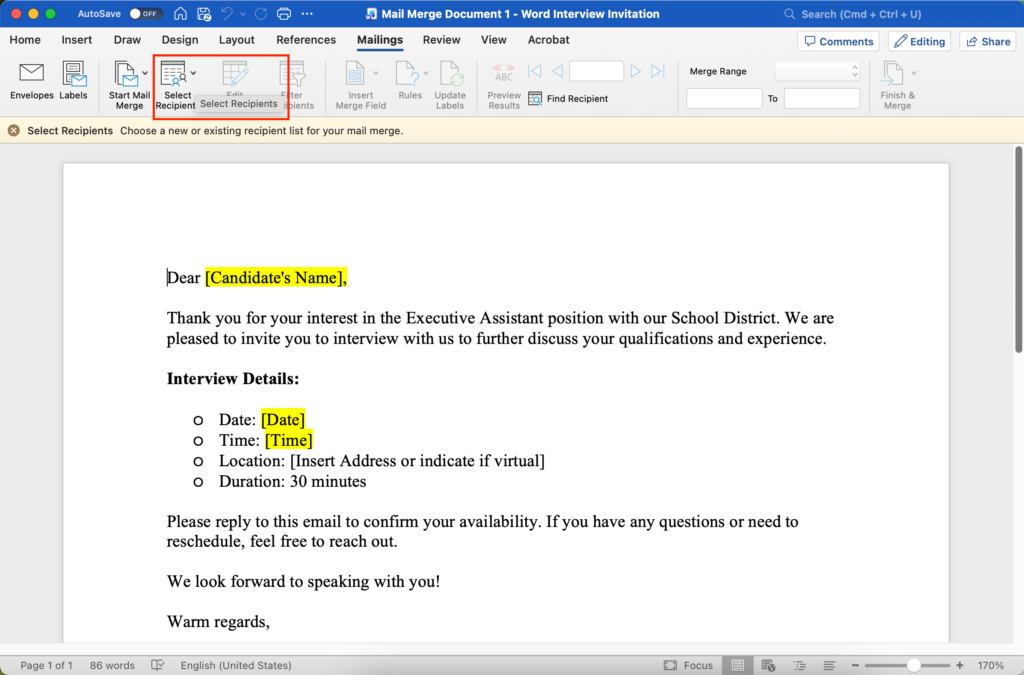
Step 4:
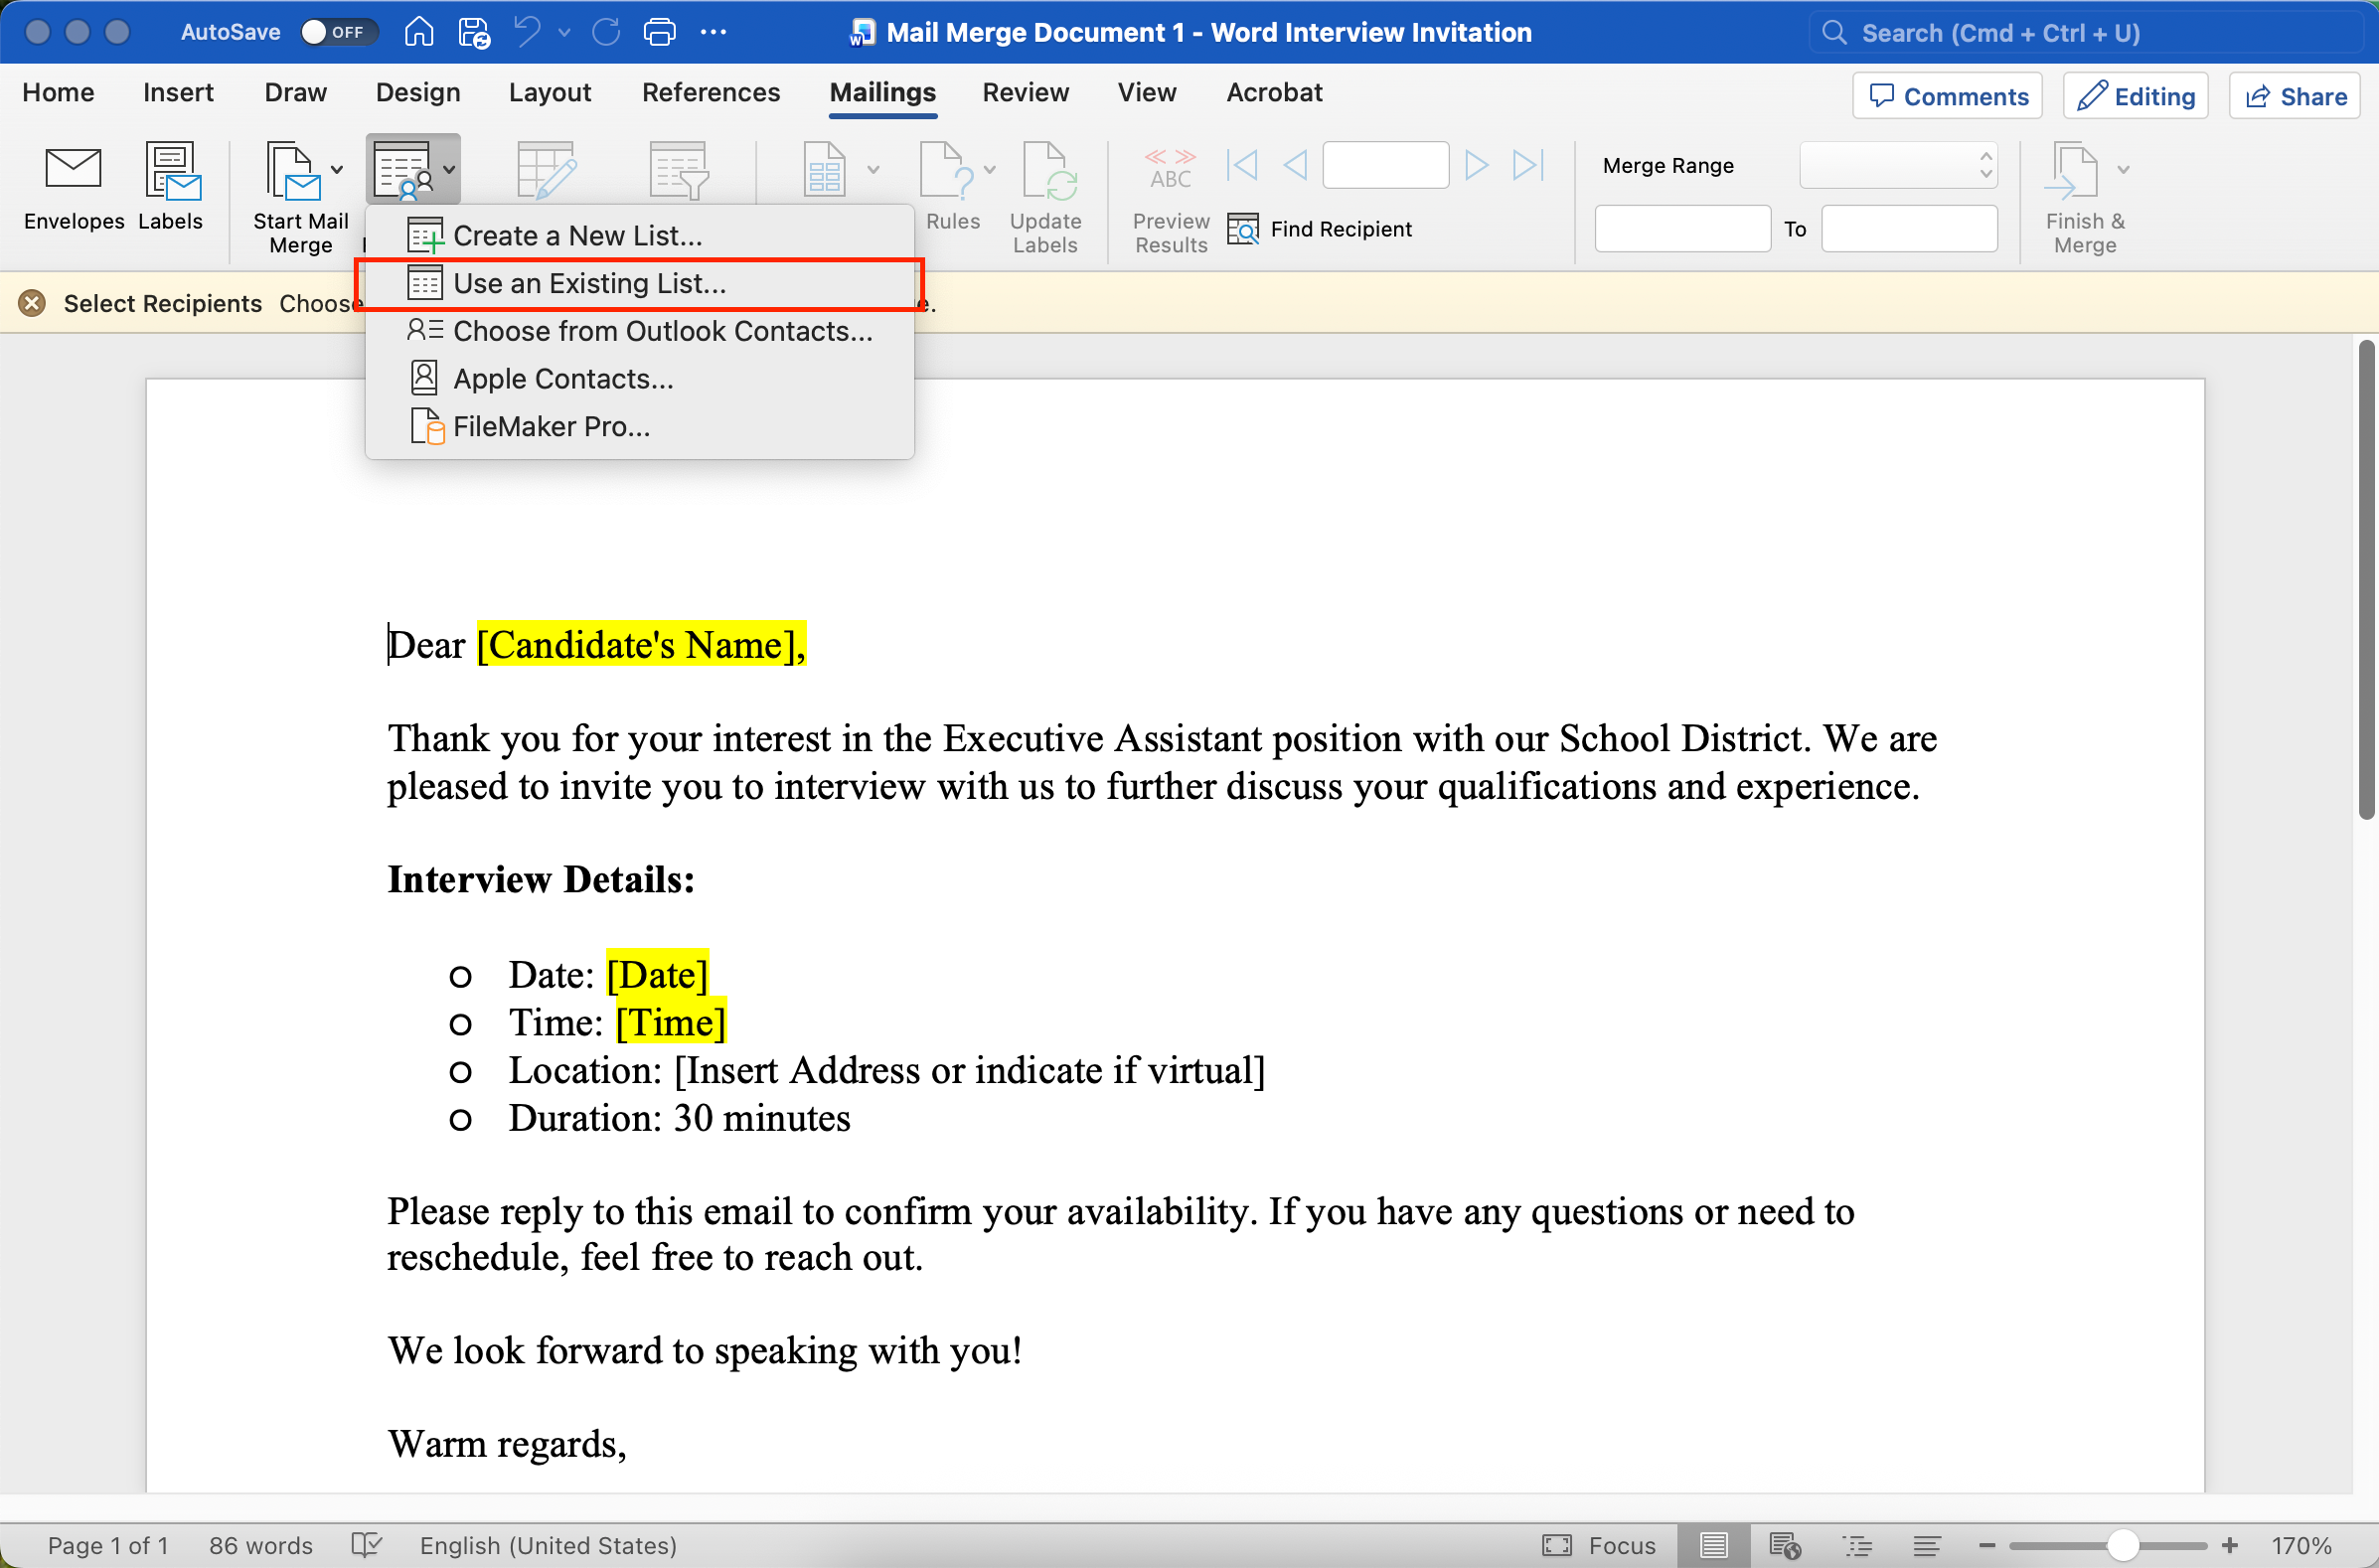
Click “Select Recipients”.
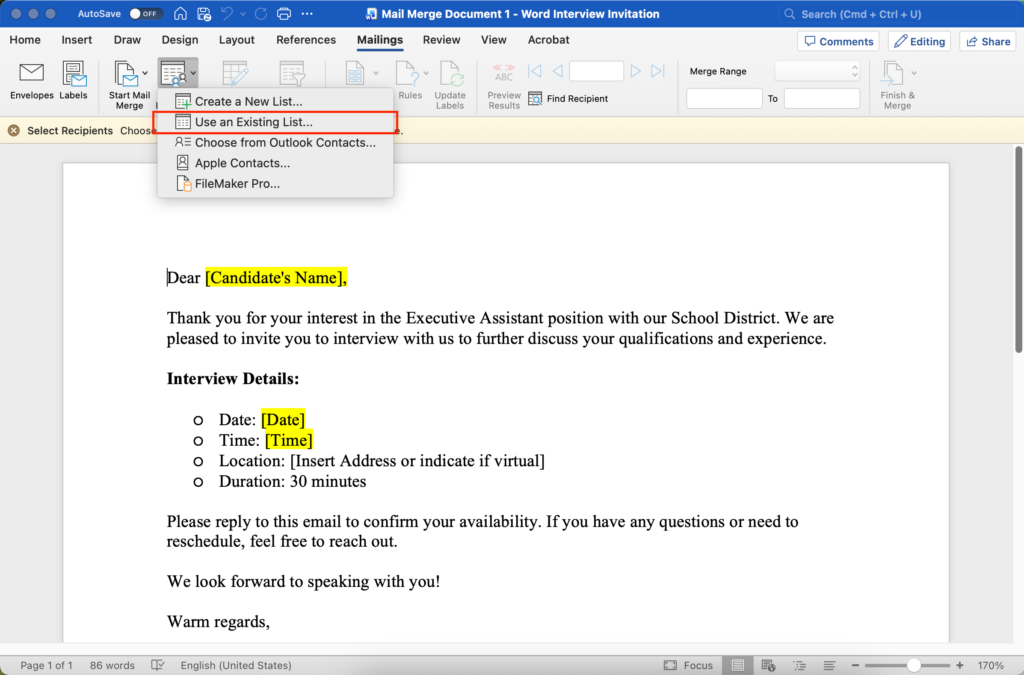
Step 5:
From the drop-down menu select “Use an Existing List…”.
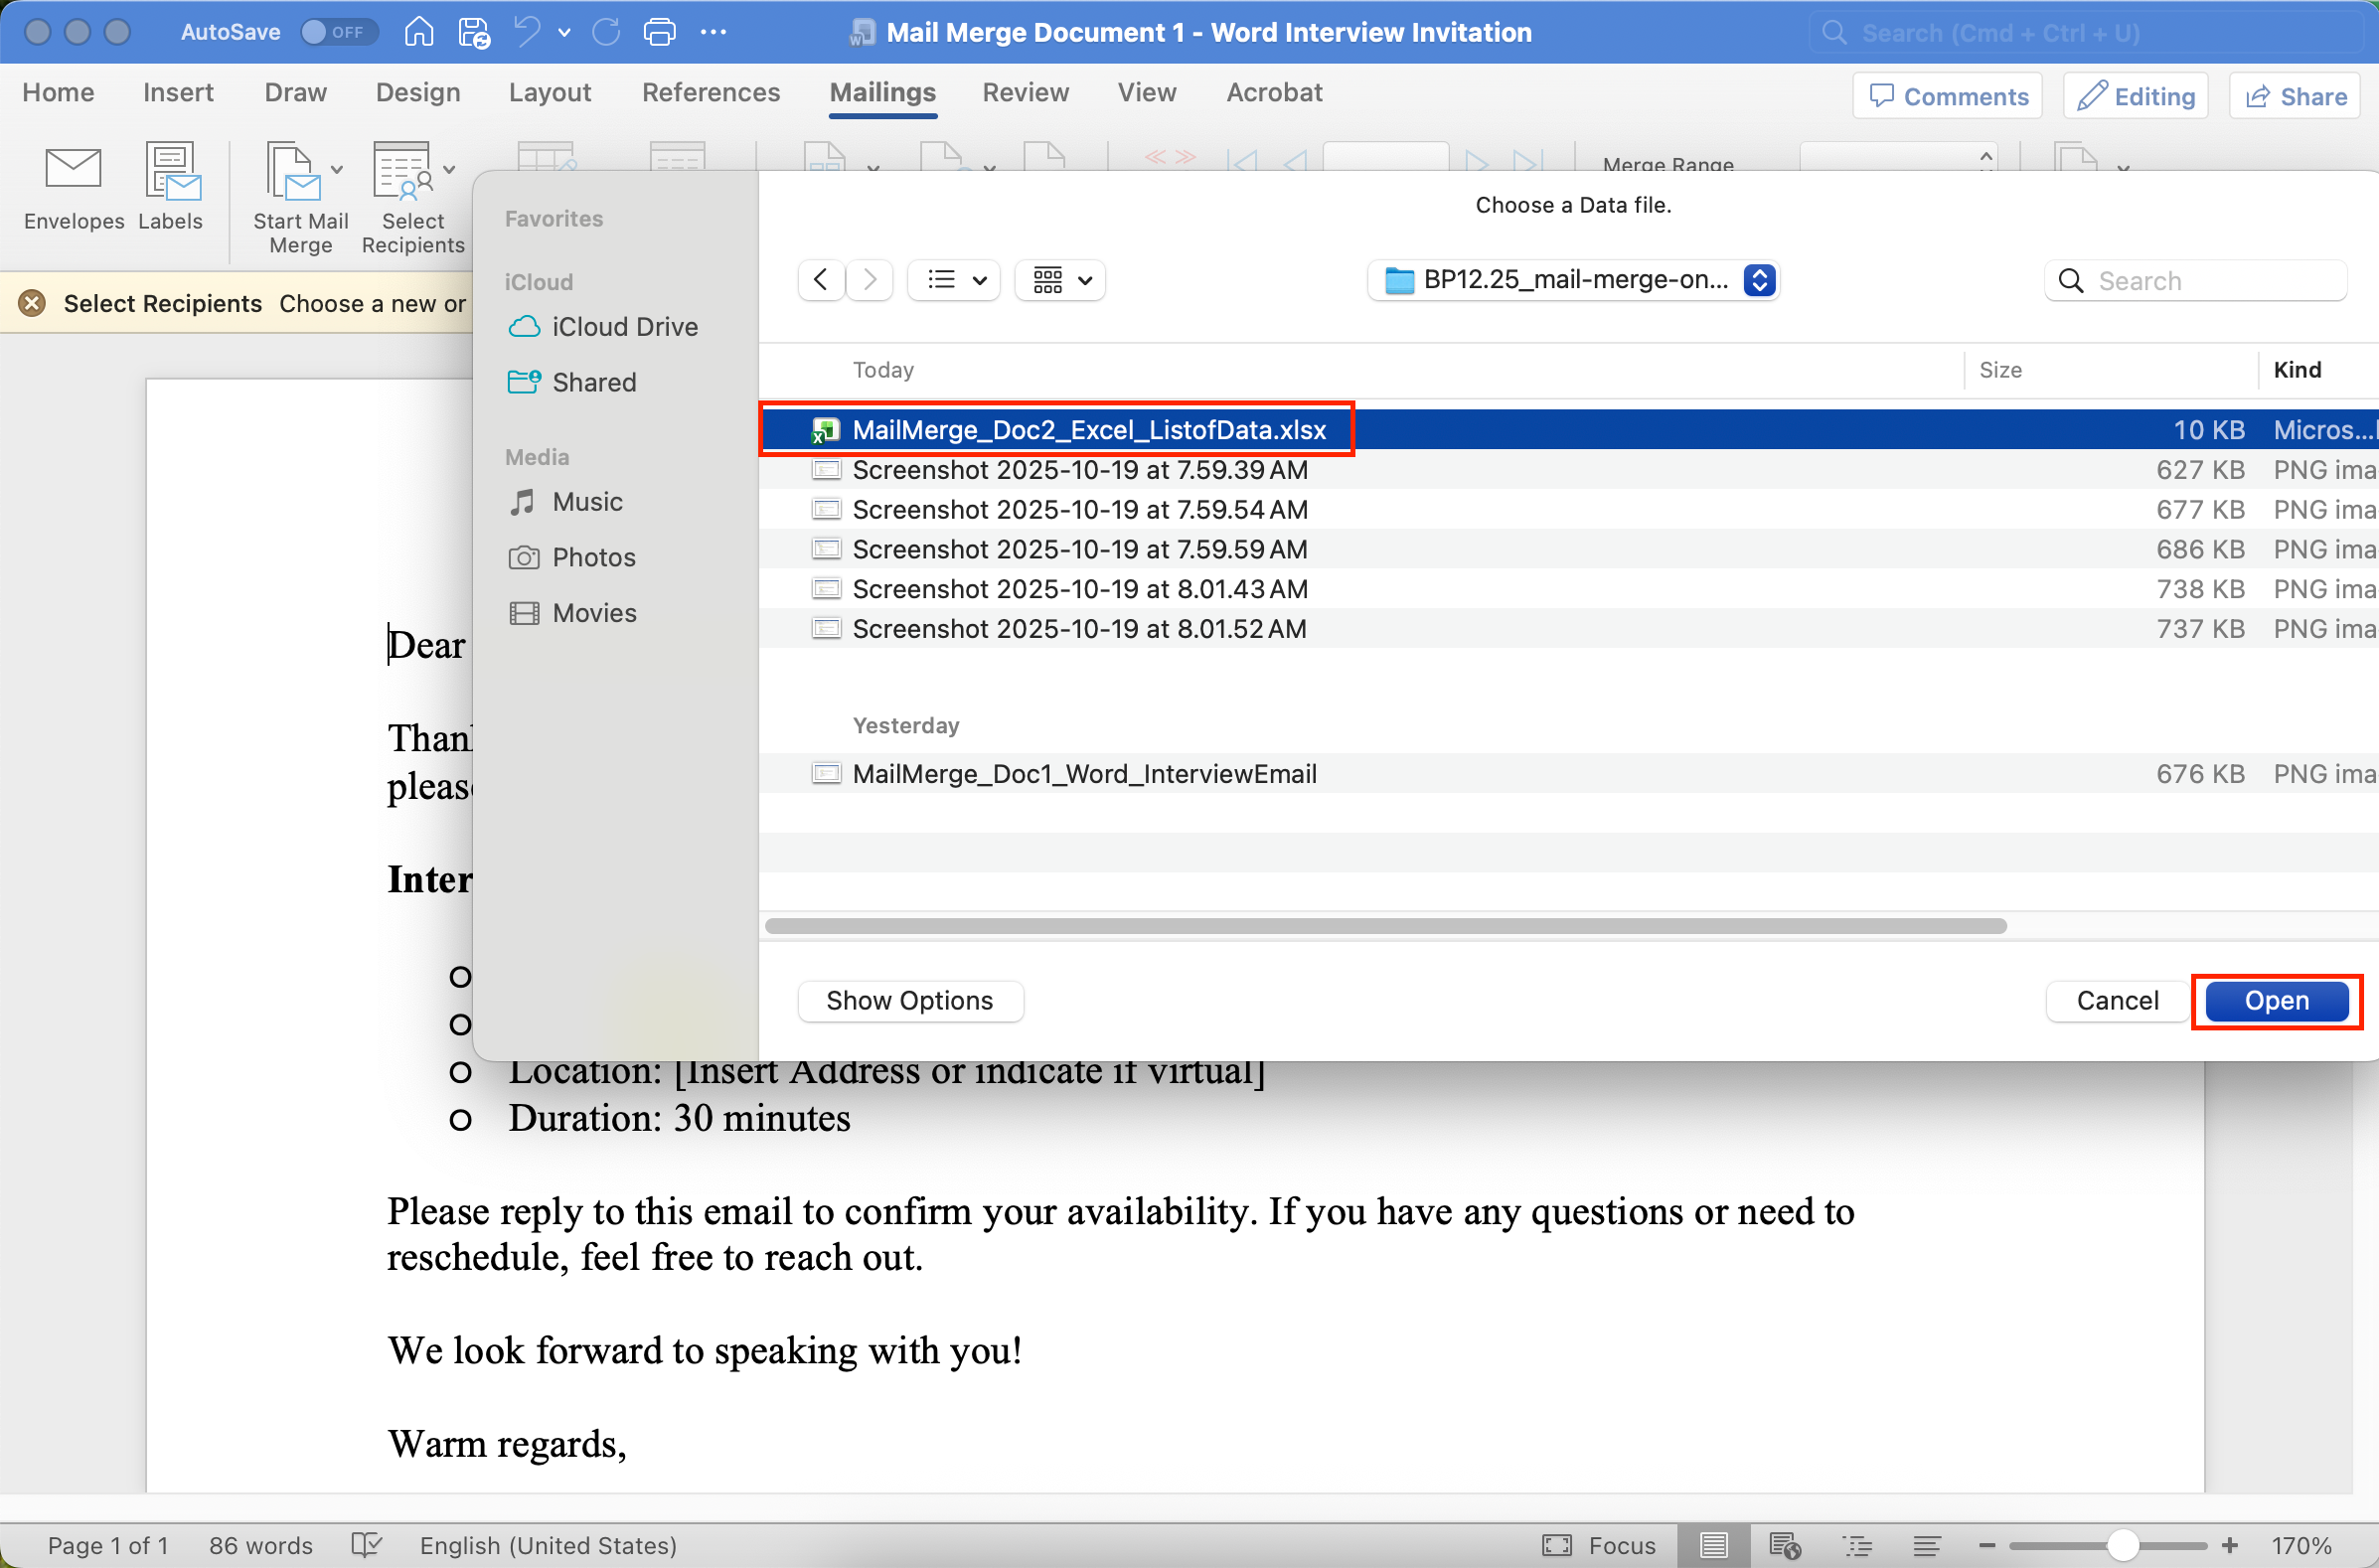
Step 6:
Select the Excel spreadsheet from your computer. Then click “Open” (on a Mac) or double-click the selected file.
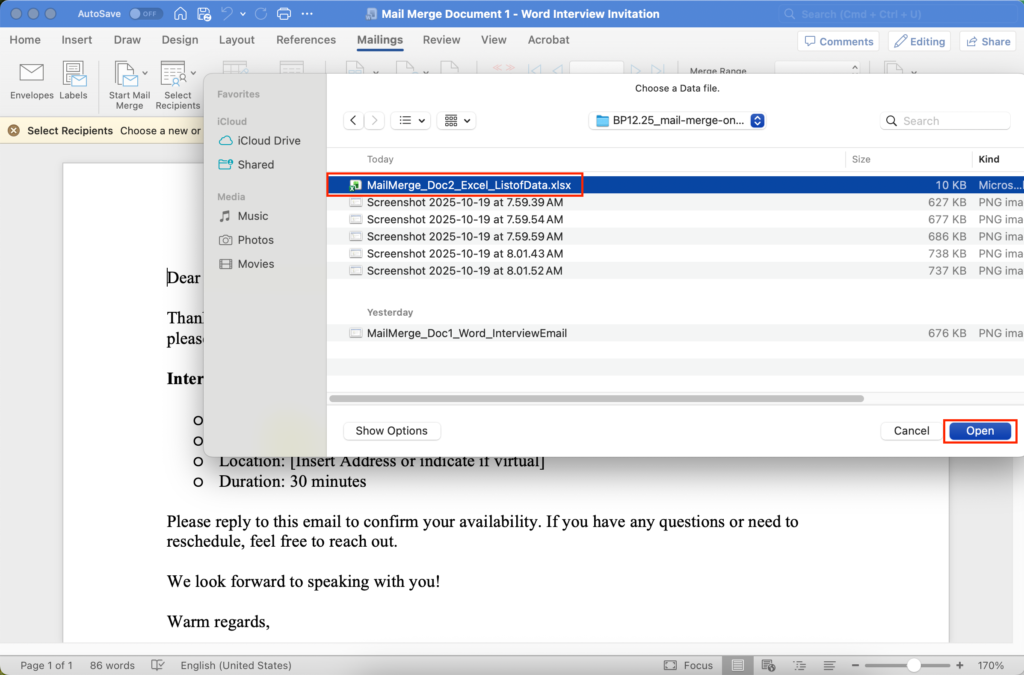
Now your Word document and your Excel spreadsheet are connected, or “merged”. You cannot continue unless you completed these first 7 steps successfully.

Step 7:
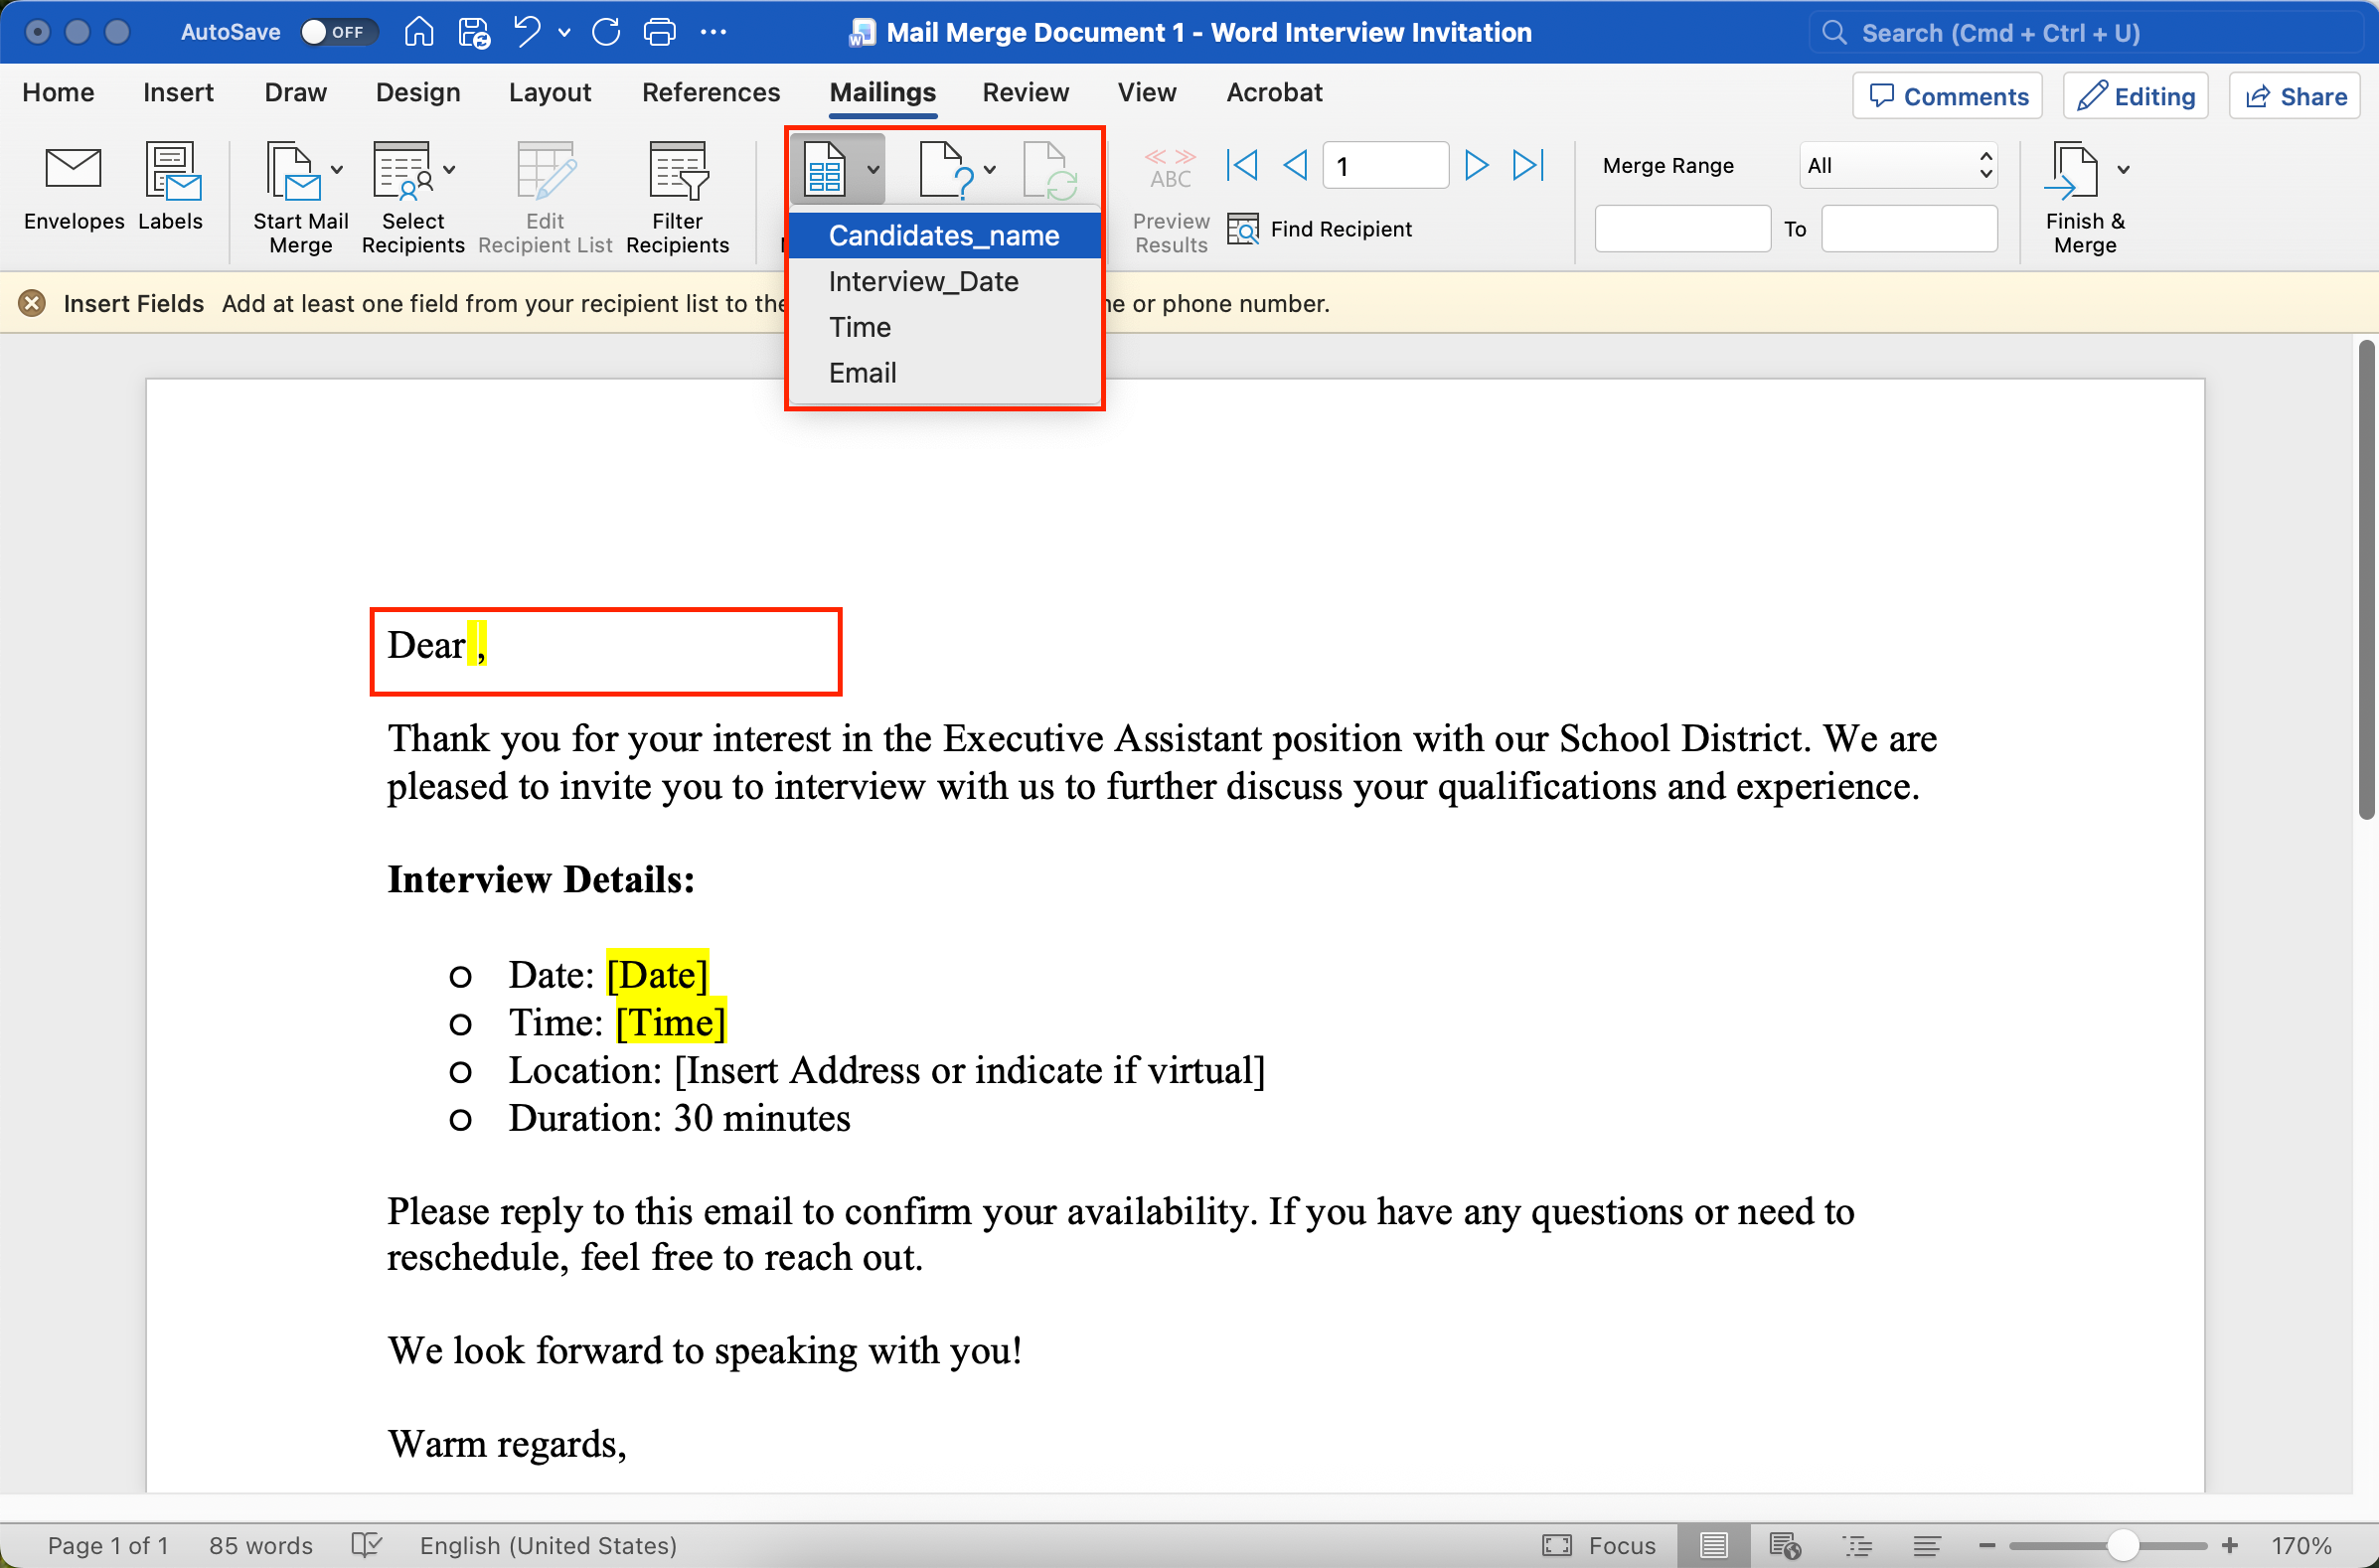
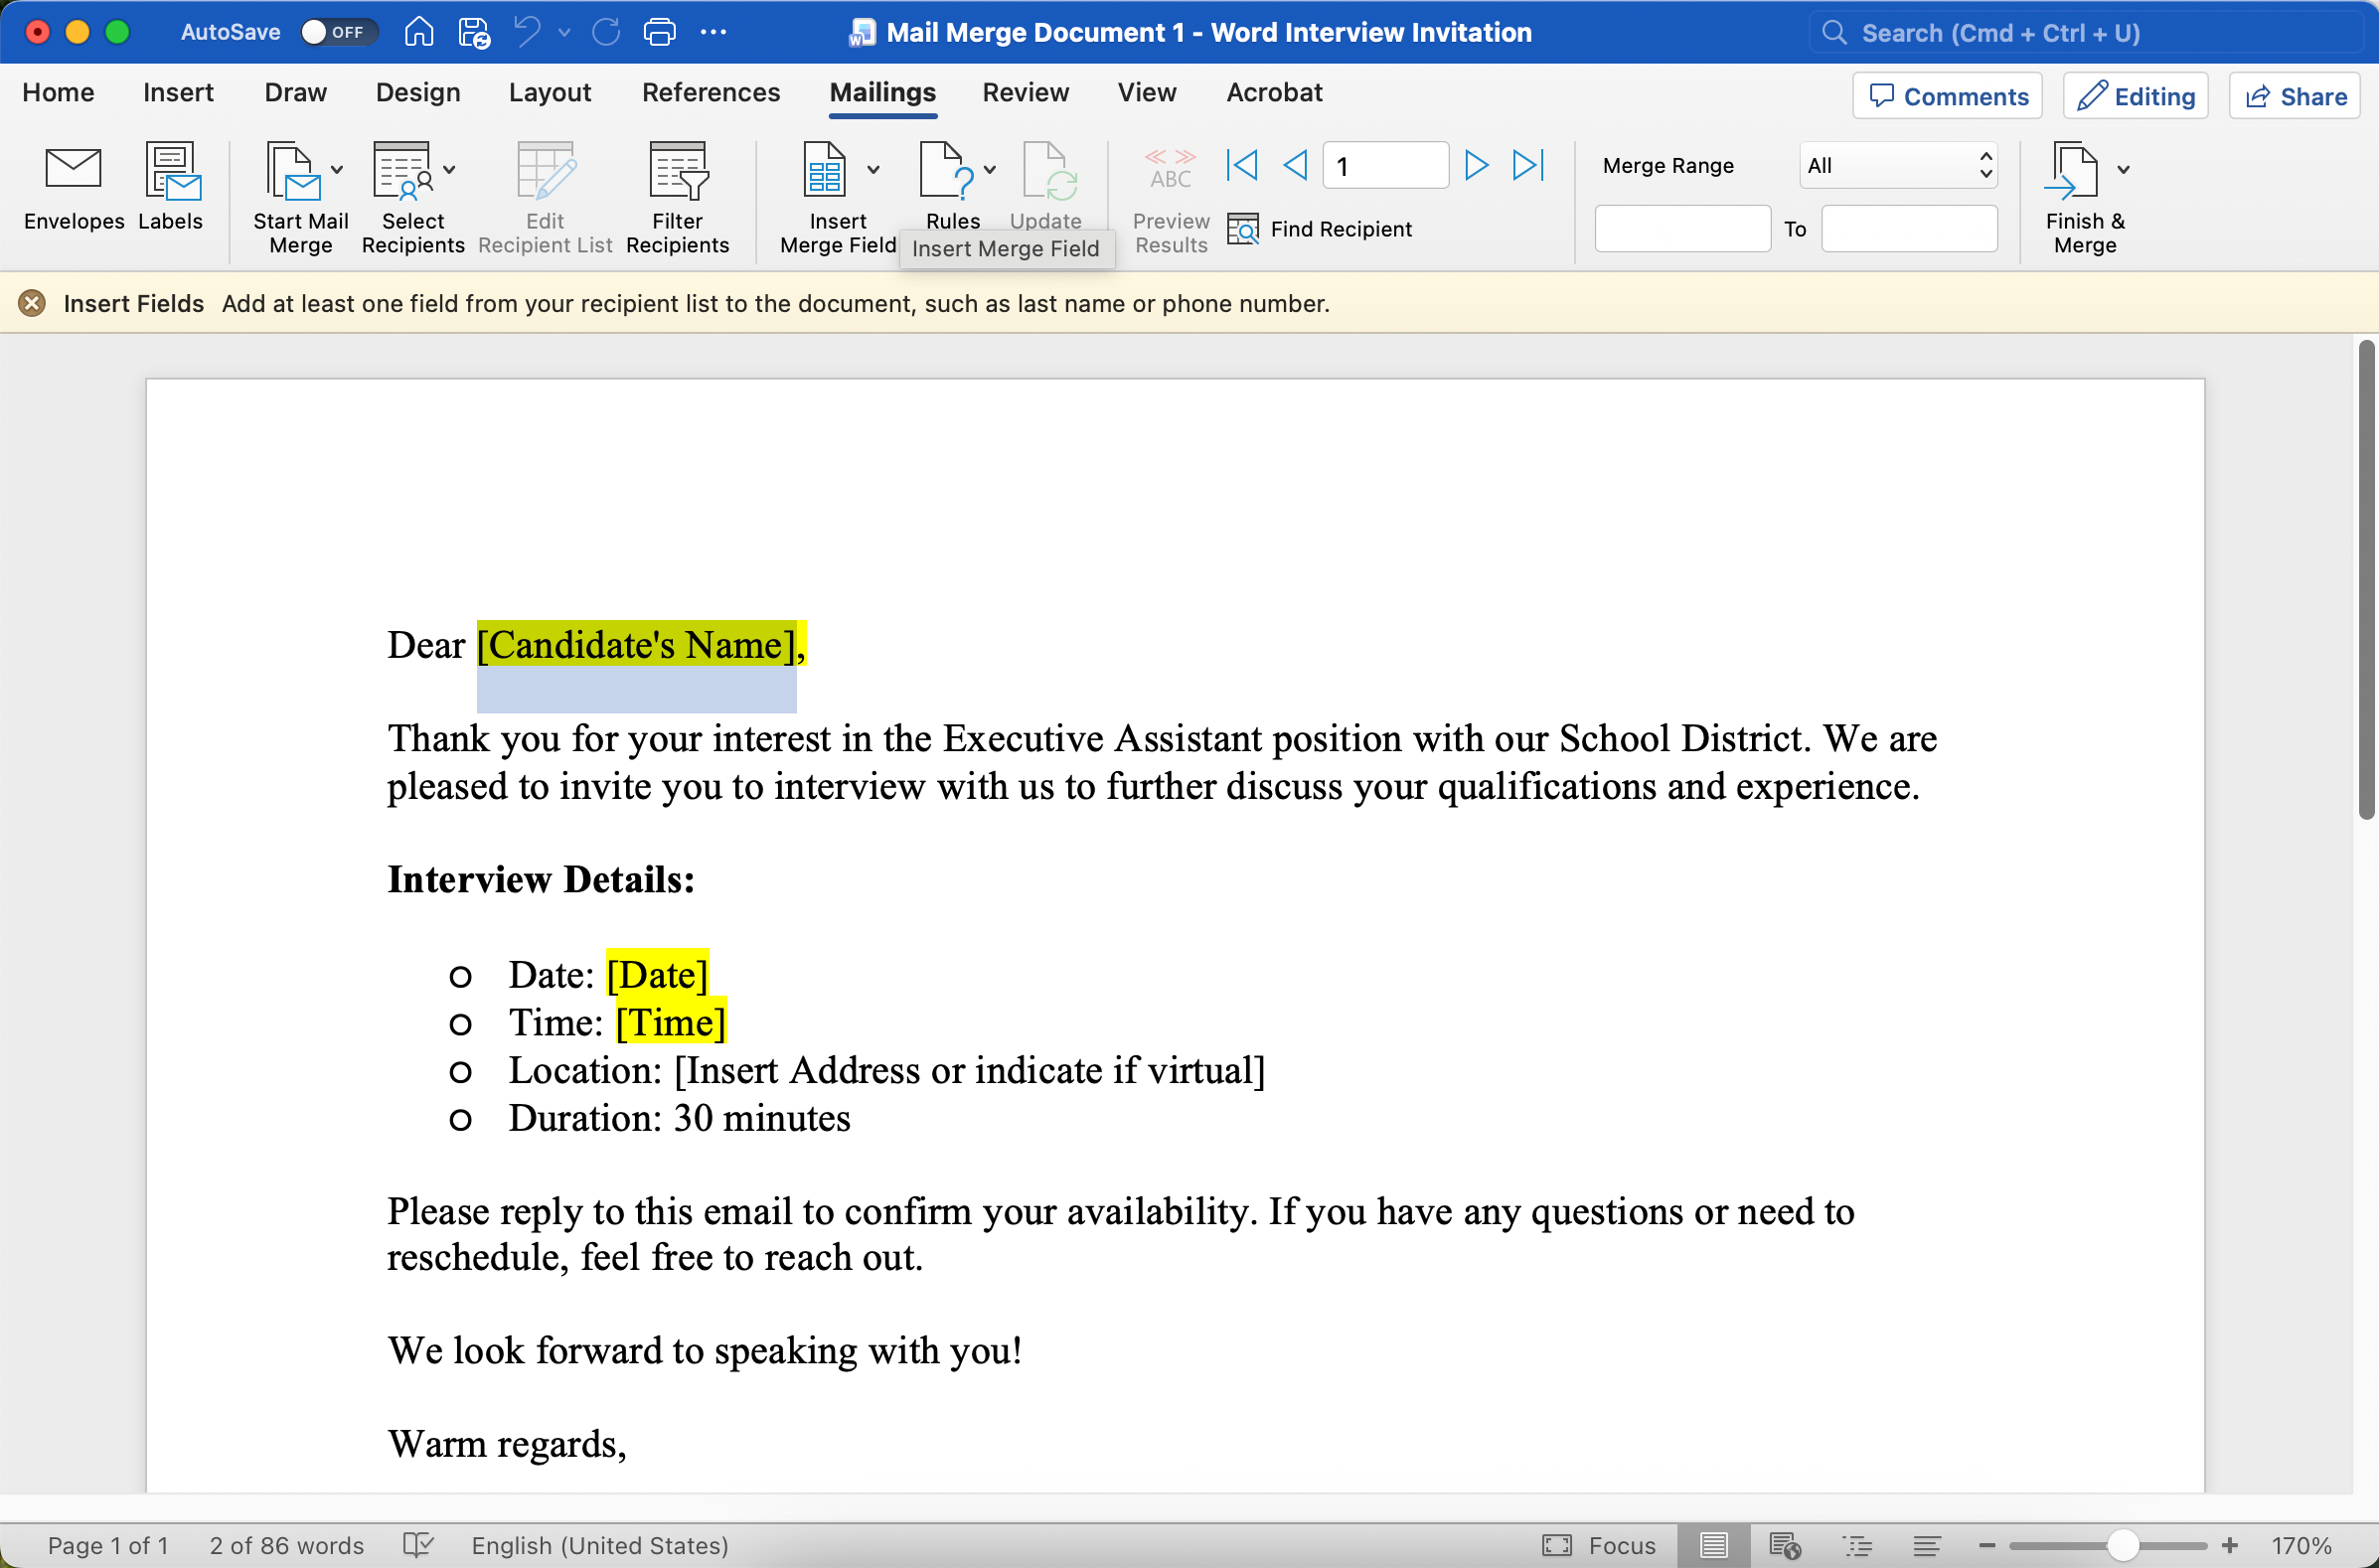
Highlight the language you want to replace with personalized fields from the Excel spreadsheet.
In this example “[Candidate’s Name]”.
Then click “Insert Merge Field”.
Step 8:
From the drop-down menu which now equals the column headers from your Excel spreadsheet, select the corresponding option.
In this example “Candidates_name”.

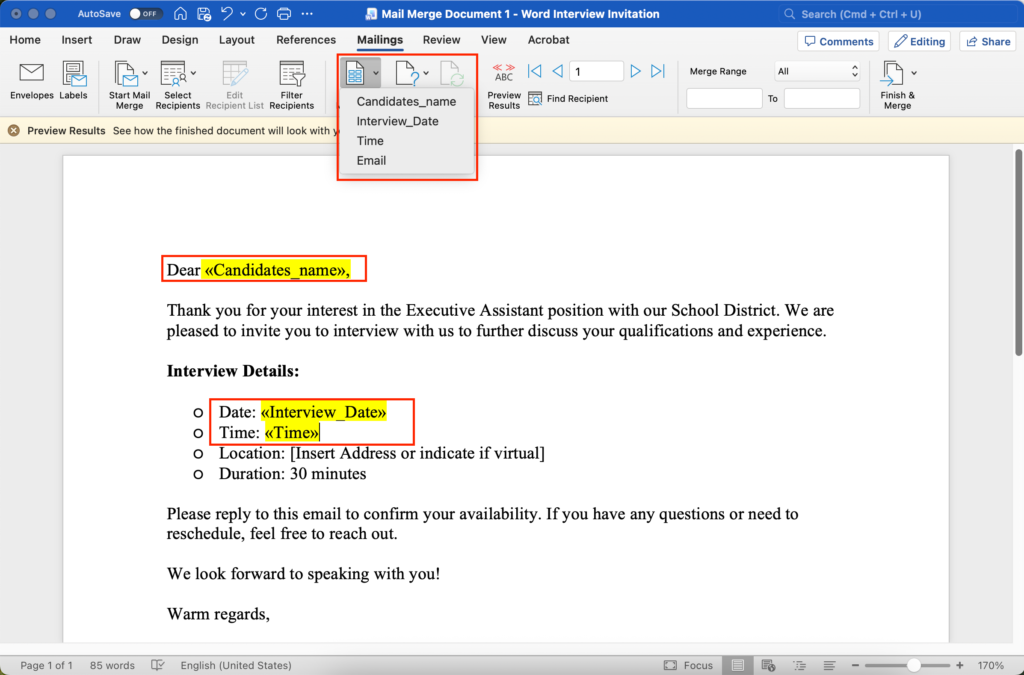
Step 9:
Insert all other merge fields in your letter.
In our example, you can see 3 inserted merge fields highlighted in yellow.
Step 10:
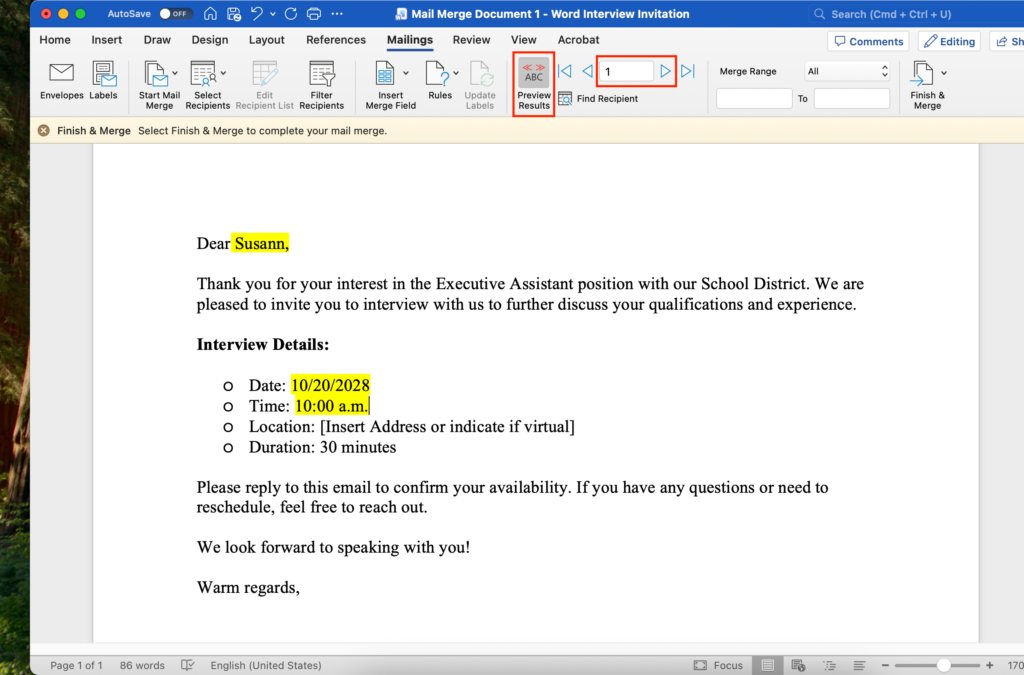
Click “Preview Results” to see what your finished Word documents would look like.
The number of Word documents will equal the number of lines with information in your Excel spreadsheet.
In our example, we only have 2 lines of information in the Excel spreadsheet, so we will only generate two personalized Word documents.
The number in the ribbon indicates which Word document you are currently previewing.

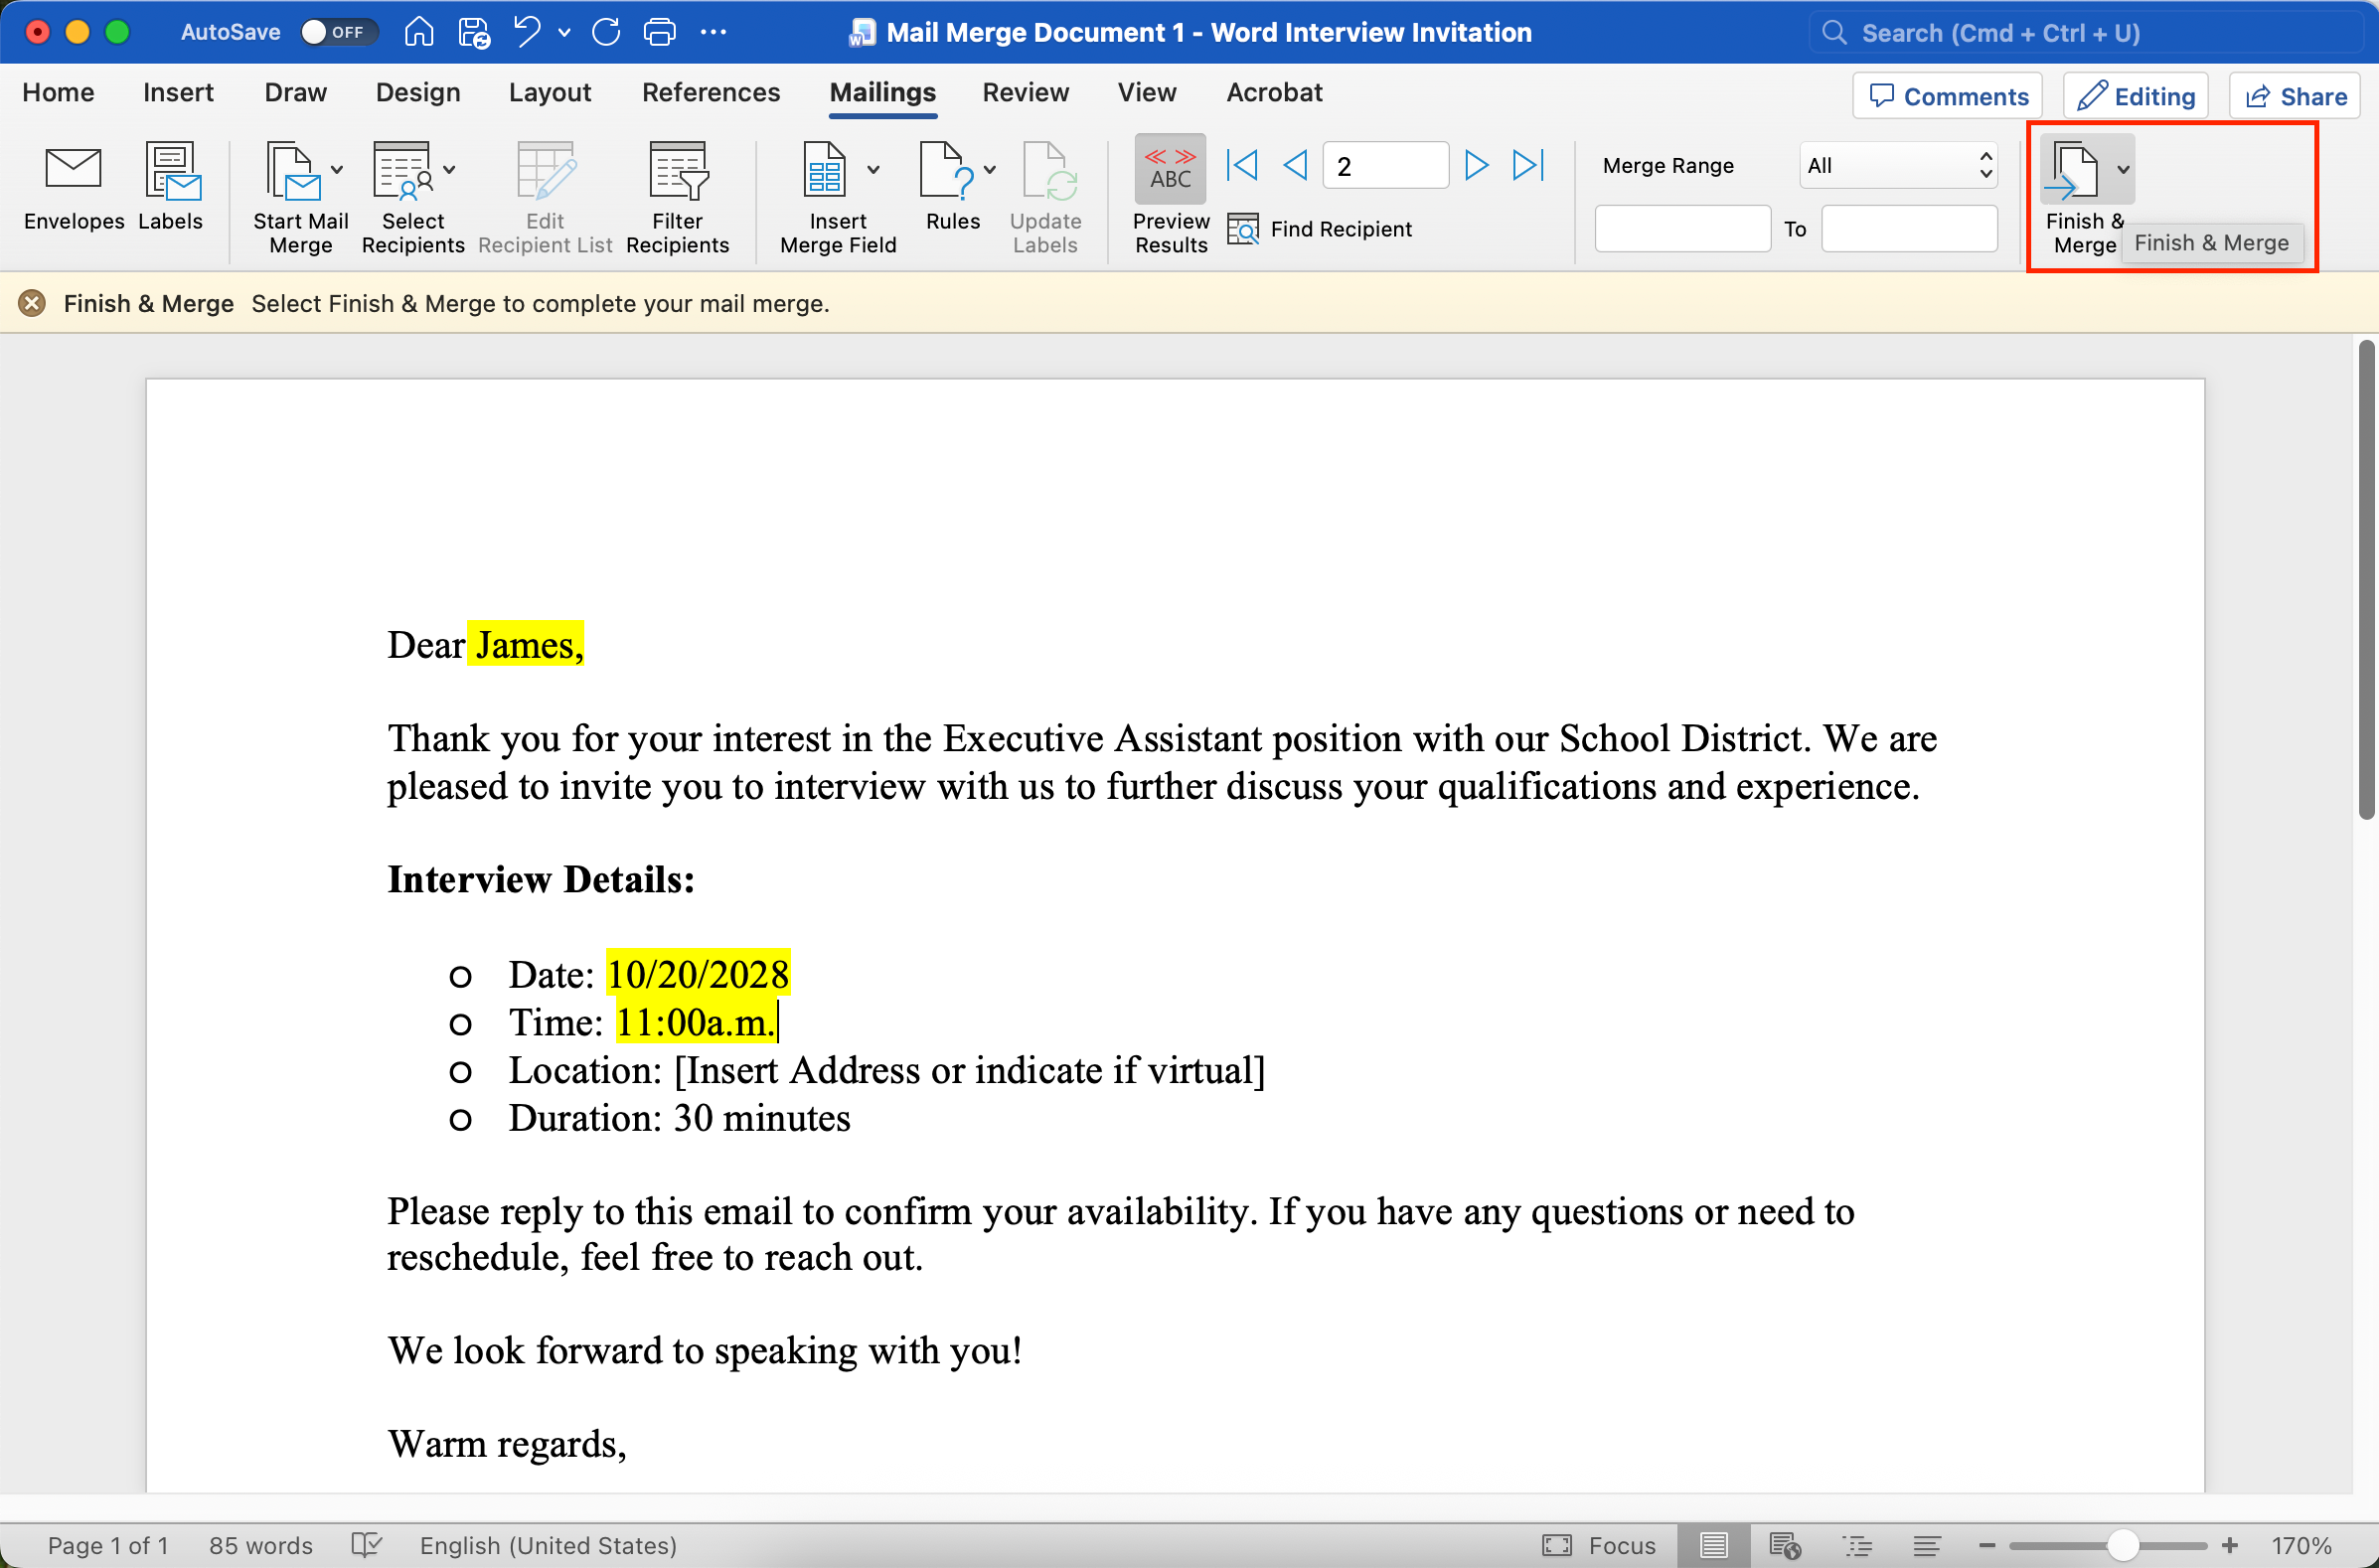
Step 11:
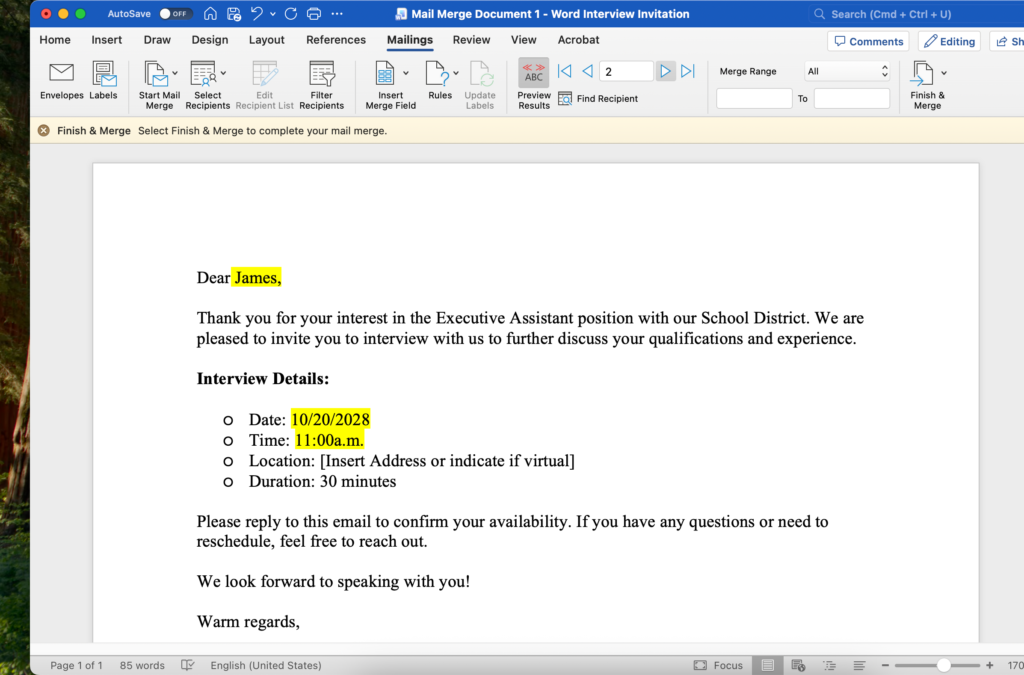
Click the right arrow to preview the next Word document.
Highlighted in yellow are the merge fields. You now see the actual information merged over from the Excel spreadsheet.
Step 12:
Here you can preview the second generated Word document.
See how the yellow highlighted fields now contain different information.

Step 13:
Finally, click “Finish & Merge”.
Tadaaaa! You did it! If you want to click through all the images quickly, do so below in the gallery! I also have a video linked further below ⬇️
Setting up a Mail Merge: The Full Process – Click the right arrow to click through all the images.


Watch the Entire Process in the Video below:
This is the video I watched myself to learn the mail merge process.
You are clearly interested in making your office life easier by making processes more efficient.
Have you ever considered:
rule for Outlook? , reducing email back and forth or using Outlook templates?
Want More Tips For An Easier Office Life? Consider these Articles:
How to Set up Rules for Outlook for Guaranteed Inbox Clarity
How to be Less Stressed at the Office with This Easy Email Habit
Email Back and Forth: The Best Way to End It For Good
Just Another Day at the Office – A Simple Daily Structure
How to Write a Professional Email Out of Office Notice
3 Proven Tips for Email Management Best Practices Outlook
How to Save an Email as a Template in Outlook
Rule for Gmail Inbox? 7 Easy Clicks to Set Them Up
How to Get Back Your Focus in the Workplace
Renaming Multiple Files at Once in 7 Surprisingly Easy Steps
How to Share and Email Template in Outlook and Why You Should Do It
How to Set Up a Mail Merge on Word
The Ultimate Guide to Email Subject Line Examples for Meeting Request
How to Organize Files Mac Step by Step Guide
How to Organize Files on Mac Computers
3 Easy Steps to Saving Templates in Outlook Desktop Mac
p.s.
One More Thing:
I am sure you would not say “no” to receiving fewer emails altogether. What if I told you there is a way you might not have thought of? A method that will reduce the number of emails you receive… I personally guarantee it!
Curious and willing to learn? Click below to receive your free email template for every future email you’ll write.
Write? Yes. You’ll see.